KIA Niro: Air Ventilation Seat
Air Ventilation Seat Components and components location
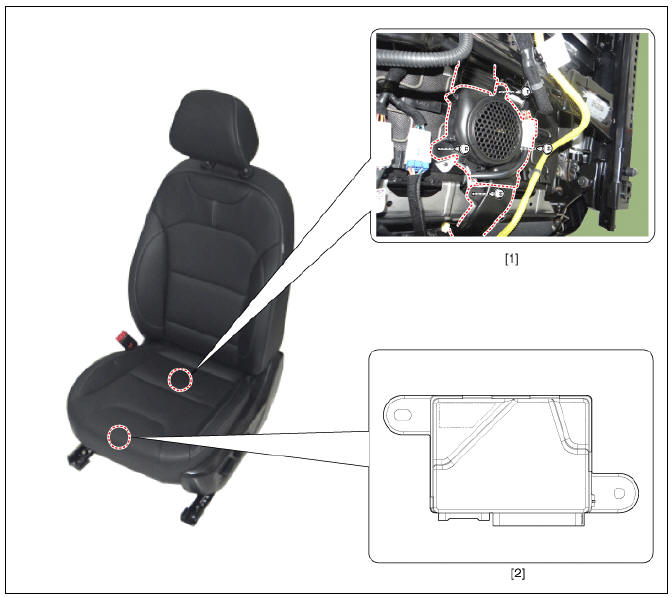
- Ventilation seat blower
- Ventilation seat unit (Assist seat only)
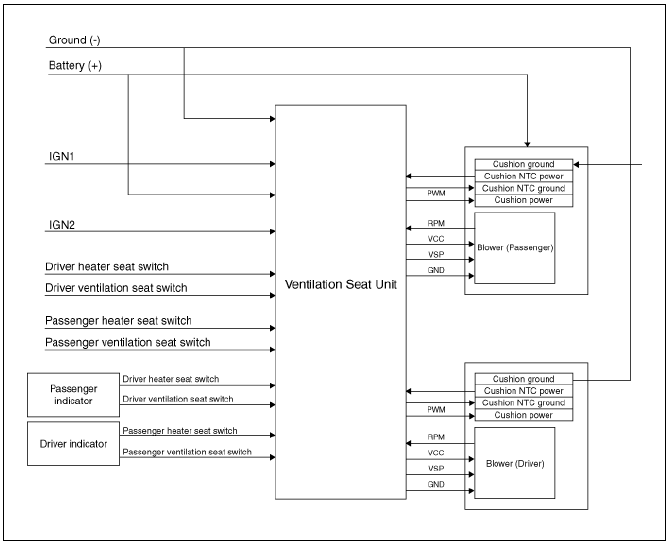
Circuit Diagram
Removal
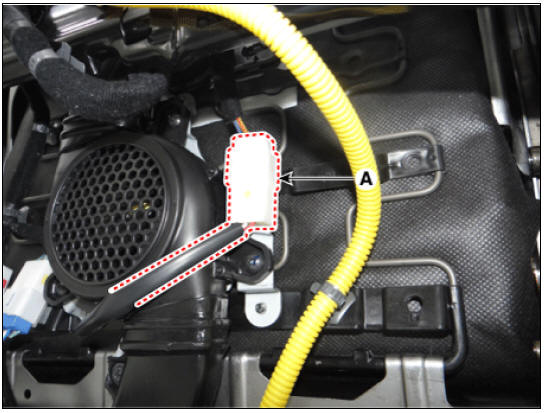
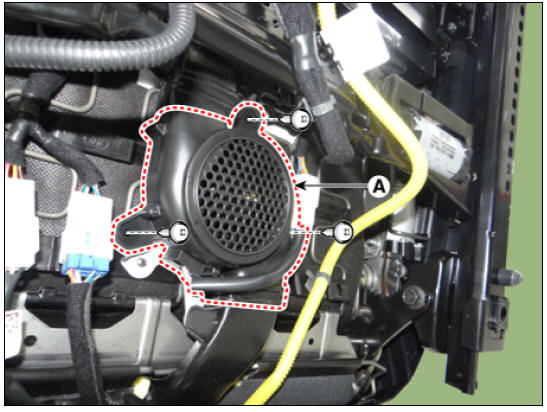
Ventilation Blower
- Disconnect the negative (-) battery terminal.
- Remove the front seat assembly.
(Refer to Body - "Front Seat Assembly")
- Disconnect the ventilation blower connector (A).
- Remove the ventilation blower ducts (A) after removing the screw and clips.
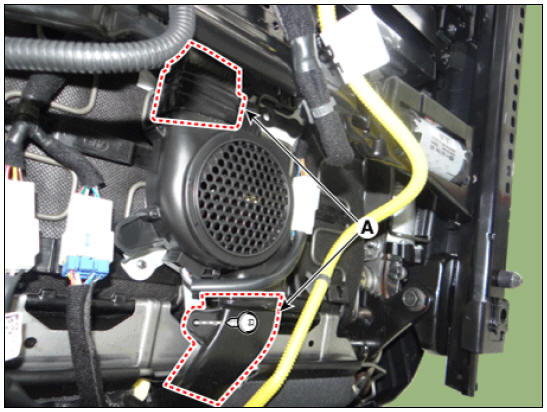
- Remove the blower fan (A) after removing the screws.
Ventilation Seat Unit
- Disconnect the negative (-) battery terminal.
- Remove the assist front seat assembly.
(Refer to Body - "Front Seat Assembly")
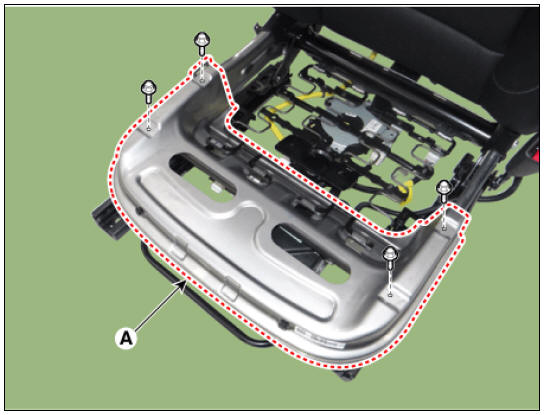
- Remove the front seat cushion cover.
(Refer to Body - "Front Seat Cushion Cover")
- Remove the front seat cushion panel (A) after loosening the mounting bolts.
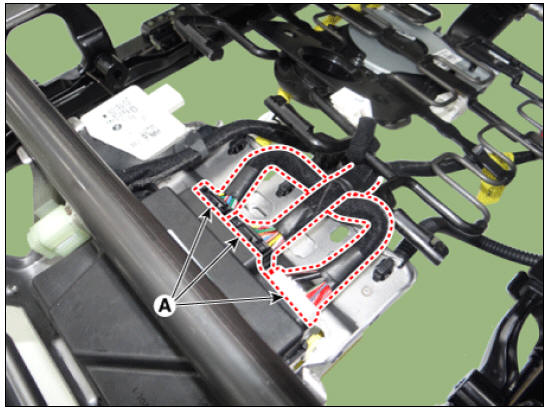
- Disconnect the ventilation seat unit connectors (A).
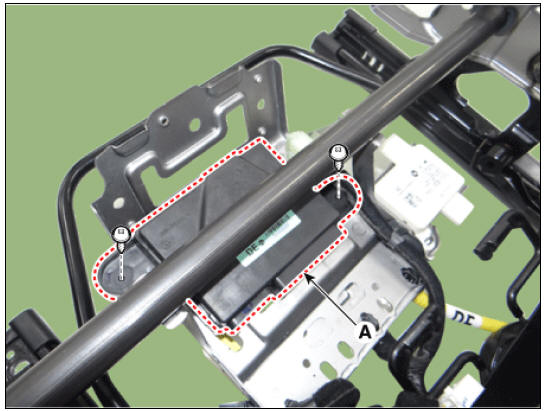
- Remove the ventilation seat unit (A) after loosening the mounting screws.
Installation
- Install in the reverse order of removal.
Inspection
Ventilation Seat Diagnostic Mode
Ventilated seat is largely composed of seat ventilation unit for control, switch for input and blower for output.
The diagnostic mode for checking normal operation of these three components has the following functions.
- Operate seat heater switch to enter diagnostic mode.
- Enter diagnostic mode by referring to below timing chart and explanation.
- Press seat heater switch as below.
(1) Press seat heater switch for over 3 seconds.
(2) Release the switch for less than 3 seconds, and press again for 1.5-3 seconds.
(3) Release the switch for less than 3 seconds, and press again for over 3 seconds.
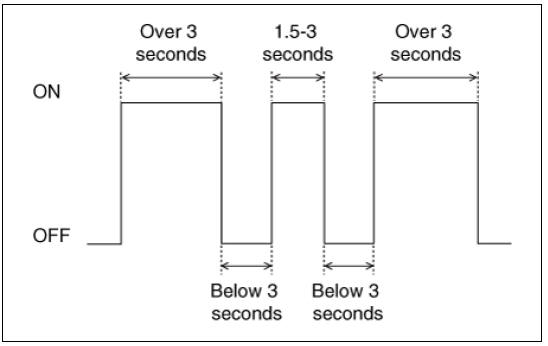
- Diagnostic mode will start immediately after 3 LED lamps of seat heater switch (Low, Mid, High) blink once.
(1) In self-diagnostic mode, only the seat heater switch LED lamps will operate.
(2) If two or more errors are detected, the lamps will blink in sequence with intervals of 2 seconds for each error code.
- After entering diagnostic mode, check LED blinking status to check
errors.

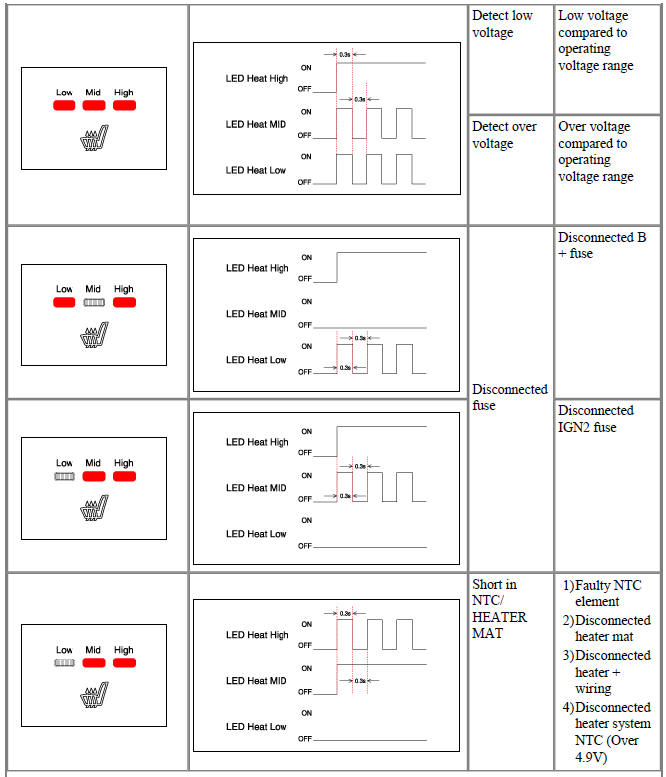
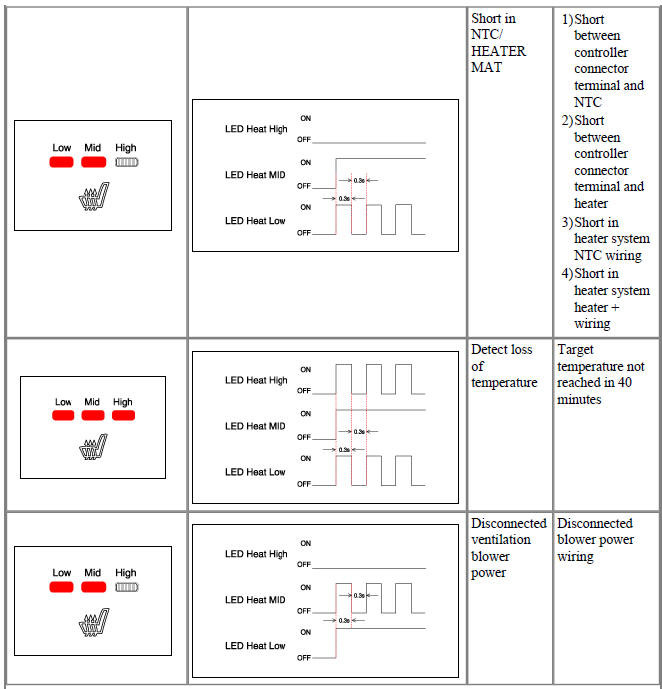
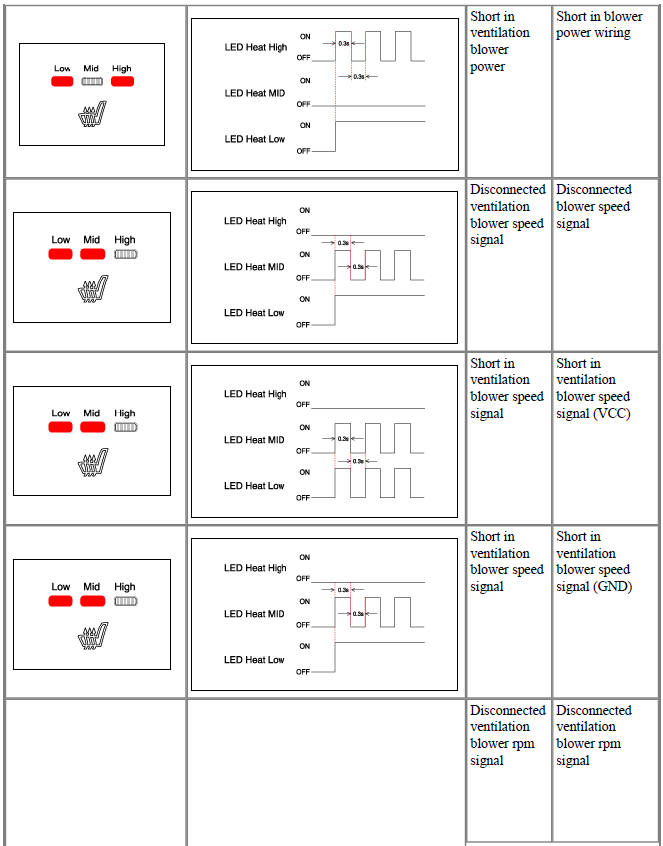
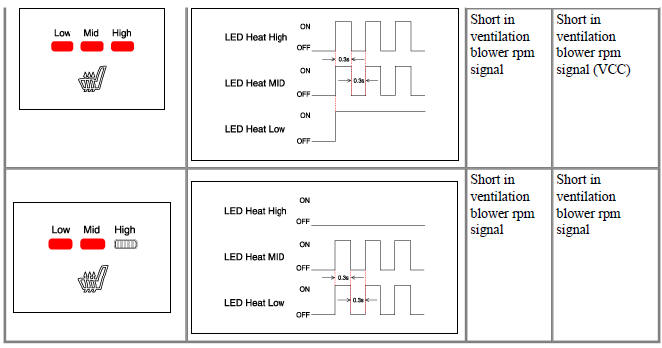
- Inspect cause of failure indicated by LED status.
- Trouble code will be recorded by seat ventilation unit.
- When the passenger side seat heater switch is pressed for over 5 seconds, the LED will blink 4 times and trouble code will be deleted.
- Switch "OFF" ignition to exit diagnostic mode of ventilated seat.
- Switch "ON" ignition and check that seat ventilation system works properly. To check trouble code, refer to step 2 again.
READ NEXT:
 Lumbar Support Units
Removal
Disconnect the negative (-) battery terminal.
Remove the front seat back cover.
(Refer to Body - "Front Seat Back Cover")
Disconnect the lumbar support motor connector (A).
Separate the retaining clips (A) from t
Smart Key System
Specifications
Smart Key Unit
RF Receiver
Smart Key
Antenna
Smart Key System / Components And Components Location
Component Location (1)
Smart key unit (SMK)
Interior antenna 1
Interior antenna 2
Buzzer
Door outsid
Smart Key System / Description And Operation
Description
The SMART KEY system is a system that allows the user to access and operate a
vehicle in a very
convenient way. To access the vehicle, no traditional key or remote control unit
is needed.
The user carries a SMART KEY FOB which do
SEE MORE:
Cylinder Head
Inspect for flatness.
Using a precision straight edge and feeler gauge, measure the contacting
surface of the cylinder block and check
the manifolds for warpage.
If the flatness is greater than maximum, replace the cylinder head.
Fla
Instrument Cluster Description and operation
Instrument Cluster Components and components location
Connector and Terminal Function
Instrument Cluster Description and operation
Description
Main Function
High speed CAN communication (C-CAN)
(1) Custom Function : car seats l
Categories
- Home
- KIA Niro EV, Hybrid - Second generation - (SG2) (2021-2024) - Owner's manual
- Kia Niro - First generation - (DE) (2017-2022) - Service and Repair Manual
- Contact Us