KIA Niro: Drive Belt / Idler Repair procedures
Drive Belt Repair procedures
Removal
- Remove the engine room under cover.
(Refer to Engine and Transaxle Assembly - "Engine Room Under Cover")
- Remove the drive belt.
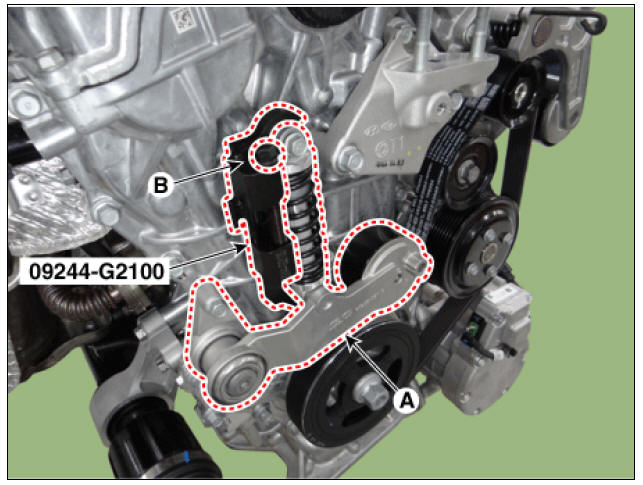
(1) Using the wrench, turning the mechanical tensioner (A) counterclockwise
and then insert a
stopper pin (B) into the hole.
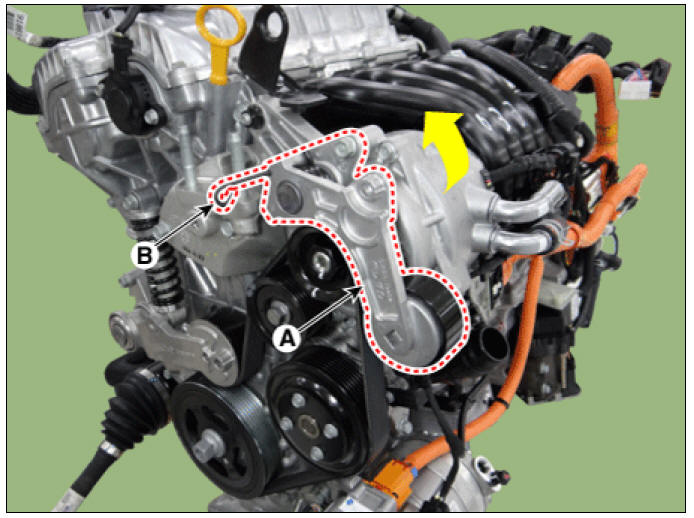
(2) Install the SST (09244 - G2100) to hydraulic tensioner (A) and then
compress the hydraulic
tensioner by tightening the adjusting bolt (B).
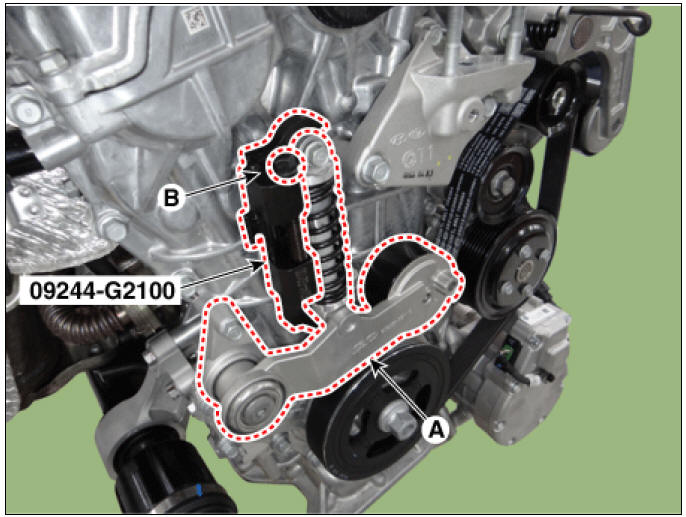
Warning
- To prevent damage the hydraulic tensioner, slowly must work by using the hand tool.
- Before using the SST (09244-G2100), check the safety pin (A) is
positioned well as
shown in the image below.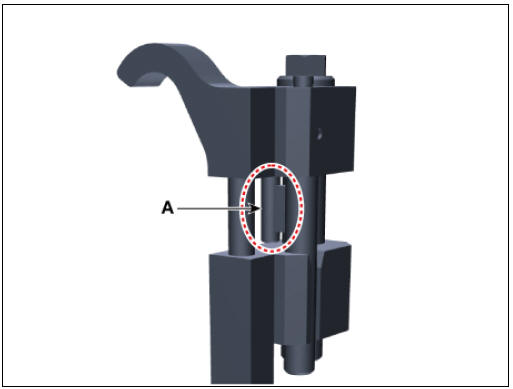
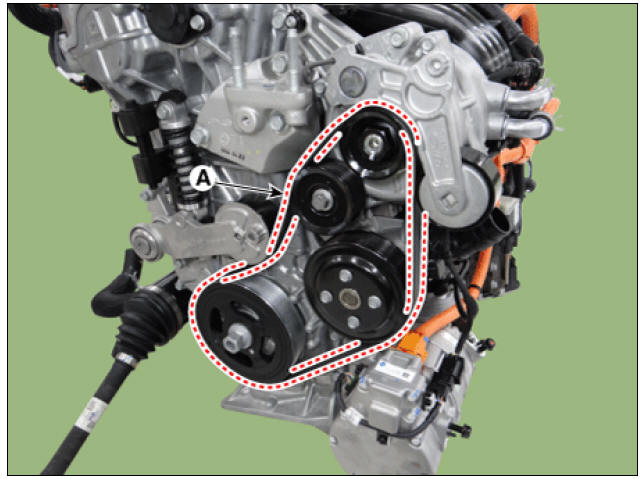
(3) Remove the drive belt (A).

Installation
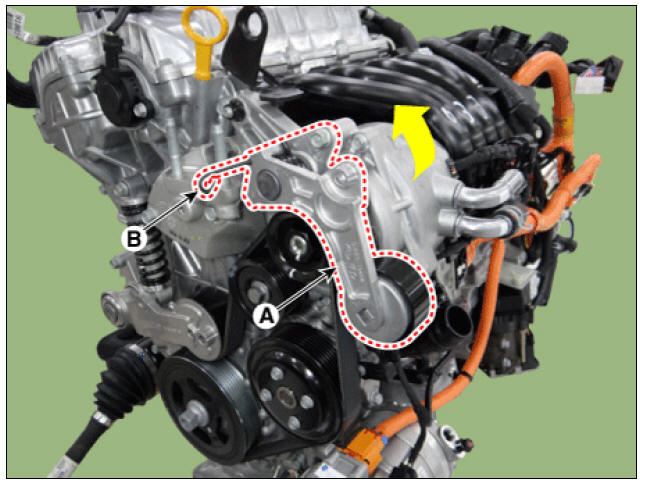
- Install the drive belt.
(1) Install the drive belt (A).
(2) Remove the SST (09244 - G2100) from the hydraulic tensioner (A) by
loosening the adjusting
bolt (B).
Warning
To prevent damage the hydraulic tensioner, slowly must work by using the hand tool.
(3) Using the wrench, slightly lift the mechanical tensioner (A) and then remove the stopper pin (B).
Slowly place the mechanical tensioner (A).
- Install the engine room under cover.
(Refer to Engine And Transaxle Assembly - "Engine Room Under Cover")
Inspection
Visually check the belt for excessive wear, frayed cords etc. If any defect has been found, replace the drive belt.
Warning
Cracks on the rib side of a belt are considered acceptable. If the
belt has chunks missing from the
ribs, it should be replaced. 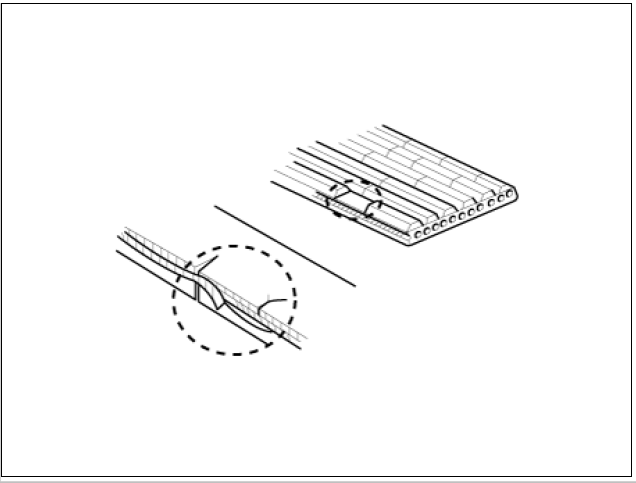
Idler Repair procedures
Removal and
Installation
- Remove the drive belt.
(Refer to Drive Belt System - "Drive Belt")
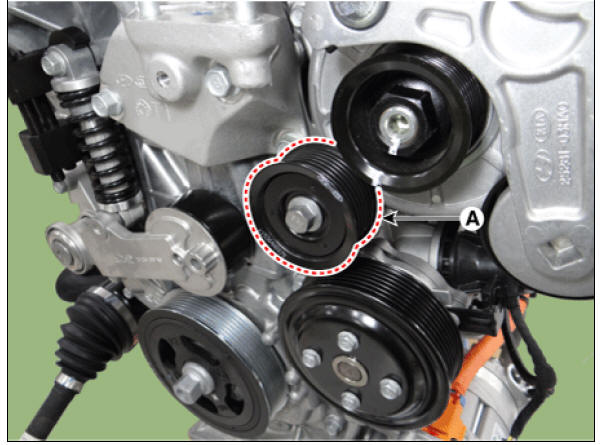
- Remove the idler (A).
Tightening torque : 39.2 - 49.0 N*m (4.0 - 5.0 kgf*m, 28.9 - 36.2 lb*ft)
- Install in the reverse order of removal
Inspection
Check the idler for excessive oil leakage, abnormal rotation or vibration. Replace if necessary.
READ NEXT:
 Drive Belt Tensioner Repair procedures
Removal and
Installation
Remove the drive belt.
(Refer to Drive Belt System - "Drive Belt")
Remove the mechanical tensioner (A).
Tightening torque :
18.6 - 23.5 N*m (1.9 - 2.4 kgf*m, 13.7 - 17.4 lb*ft)
Remove the hydr
Engine And Transaxle Assembly
Engine Room Under Cover Repair procedures
Removal
Engine room under cover.
Remove the engine room under cover (A).
Tightening torque :
3.9 - 5.9 N*m (0.4 - 0.6 kgf*m, 2.9 - 4.3 lb*ft)
Install in the reverse order of removal.
Engine Mounting Repair Procedures
Engine Mounting Components and components location
Transaxle mounting bracket
Roll rod bracket
Engine mounting bracket
Engine mounting support bracket
Engine Mounting Repair Procedures
Removal and
Installation
Engine Mounting Brac
SEE MORE:
Electric Water Pump (EWP) Repair procedures
Description
The Hybrid Power Control Unit (HPCU) uses various semiconductors that are
supplied with high voltage, hence generating
more heat than engine combustion devices. Overheating can decrease the
efficiency of control devices, restrict pr
Clutch Actuator Motor
Remove the under cover.
(Refer to Engine Mechanical System - "Engine Room Under Cover")
Remove the front wheel guard (LH).
(Refer to Body - "Front Wheel Guard")
Disconect the clutch actuator connector (A).
Motor
Categories
- Home
- KIA Niro EV, Hybrid - Second generation - (SG2) (2021-2024) - Owner's manual
- Kia Niro - First generation - (DE) (2017-2022) - Service and Repair Manual
- Contact Us