KIA Niro: Headlamp Leveling System
Kia Niro - First generation - (DE) (2017-2022) - Service and Repair Manual / Body Electrical System / Headlamp Leveling System

- Headlamp leveling actuator
- Headlamp leveling switch
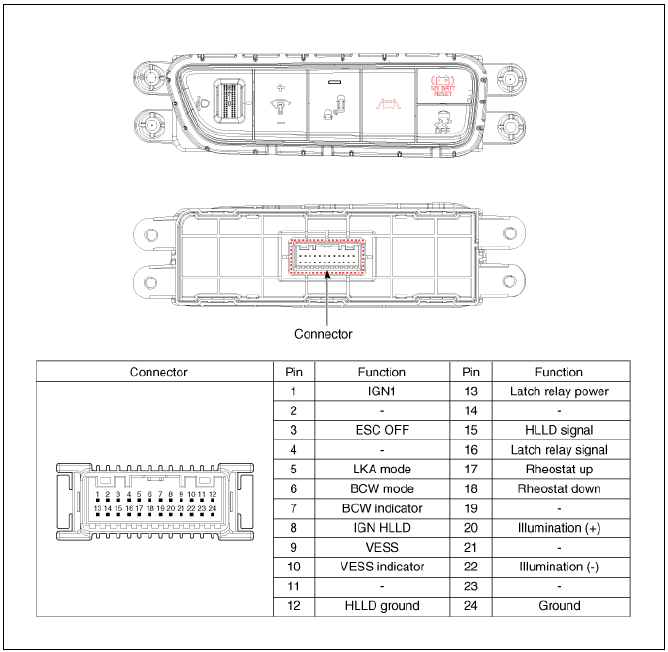
Connector and Terminal Function
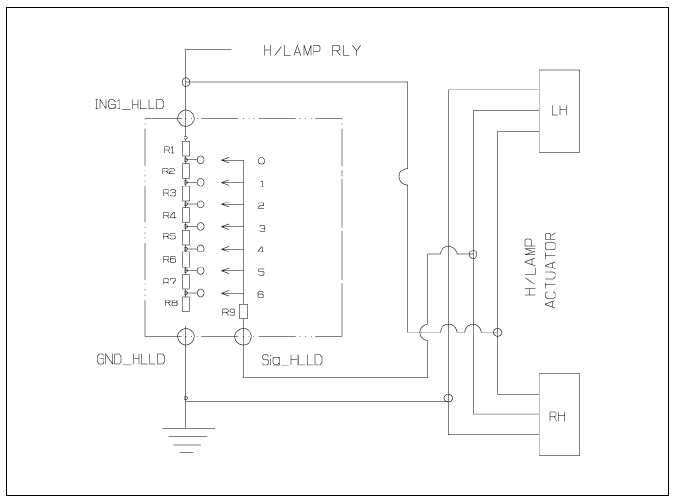
Circuit Diagram
Headlamp Leveling Switch Repair procedures
Removal
- Disconnect the negative (-) battery terminal.
- Remove the crash pad lower panel.
(Refer to Body - "Crash Pad Lower Panel")
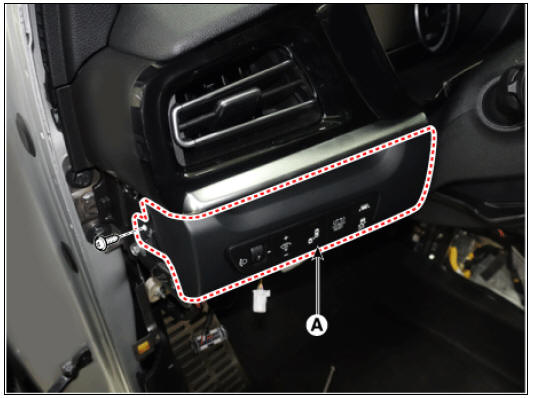
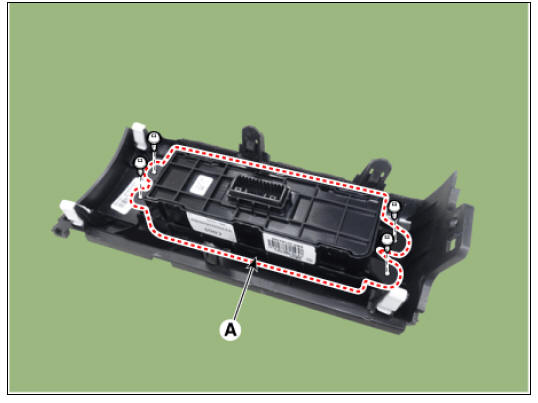
- Remove the crash pad plate (LH) (A) after loosening the screws.
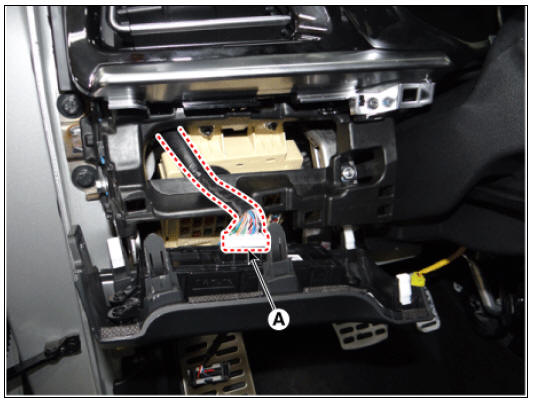
- Disconnect the crash pad side switch connector (A).
- Remove the crash pad side switch (A) after loosening the screws.
Installation
- Install in the reverse order of removal.
READ NEXT:
 Horn
Horn
Specifications
Horn switch
Horn relay (Built - in Metal Core Block PCB)
Horn (Low pitch)
Horn (High pitch)
Clock spring
Body Electrical System / Horn / Repair Procedures
Removal
Remove the front bumper cover.
(Refer to Bod
Ignition Switch
Ignition Switch / Repair Procedures
Inspection
Disconnect the key warning switch connector (A) and ignition switch
connector (B) from the steering column.
Check for continuity between the terminals.
If continuity is not specif
SEE MORE:
Suspension System
Service
Data
Front Suspension
Rear Suspension
Wheel & Tire
Wheel Alignment
Tightening
Torques
Front Suspension
Rear Suspension
Special Service Tools
Tool Name / Number / IIIustration
/ Description
Identification Number Locations
Identification Numbers
Identification Number Description
Vehicle Identification Number
World Manufacturer Identifier (WMI)
KNA : Passenger vehicle, MPV(Multipurpose Passenger Vehicle)/SUV(Sports
Utility Vehicle)/RV(Recreational
Categories
- Home
- KIA Niro EV, Hybrid - Second generation - (SG2) (2021-2024) - Owner's manual
- Kia Niro - First generation - (DE) (2017-2022) - Service and Repair Manual
- Contact Us