KIA Niro: In-car Sensor
In-car Sensor Description and operation
Description
The in-car air temperature sensor is built into the heater & A/C control unit.
The sensor consists of a thermistor that measures the temperature inside the vehicle. The signal decided by the resistance that varies with the perceived inside temperature, is delivered to the heater control unit, based on which the unit regulates the in-car temperature to intended value.
Replacement
- Disconnect the negative (-) battery terminal.
- Remove the center fascia lower panel.
(Refer to Body - "Center Fascia Panel")
- Loosen the screw and remove the heater and air conditioner control unit (A).
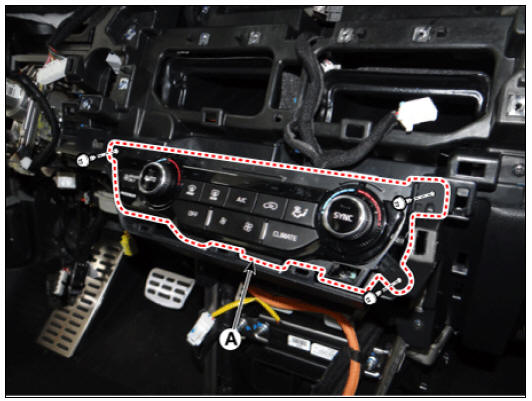
- Remove the heater and the air conditioning control unit connector (A).
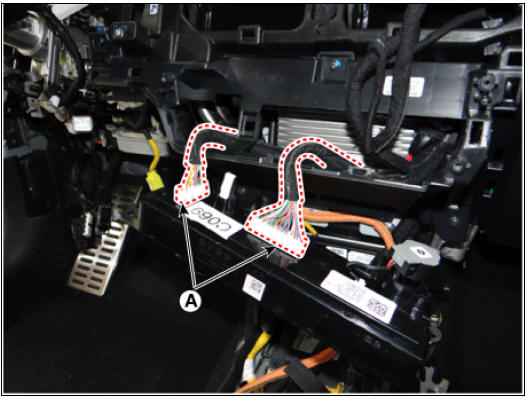
- Disconnect the room temperature sensor connector (A).
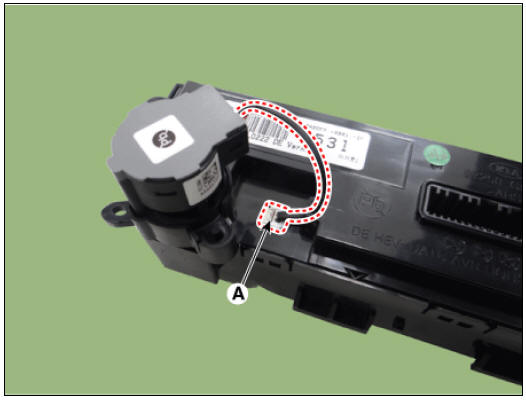
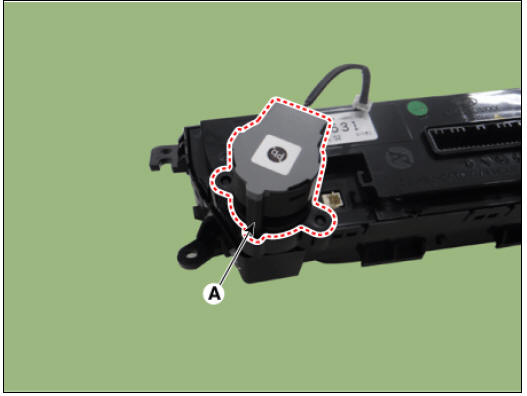
- Press the fixing pin and remove the room temperature sensor (A).
- Install in the reverse order of removal.
Warning
- Make sure that the connector is connected properly.
- Replace any damaged clips.
Photo Sensor
Description
The photo sensor is located at the center of the defrost nozzles.
The photo sensor contains a photovoltaic (sensitive to sunlight) diode. The solar radiation received by its light receiving portion, generates an electromotive force in proportion to the amount of radiation received which is transferred to the automatic temperature control module so that the solar radiation compensation will be performed.
Inspection
- Switch "ON" the ignition.
- Connect the KDS.
- Emit intensive light toward the photo sensor using a lamp, and check the change in output voltage.
- The voltage will rise with higher intensive light and fall with lower intensive light.
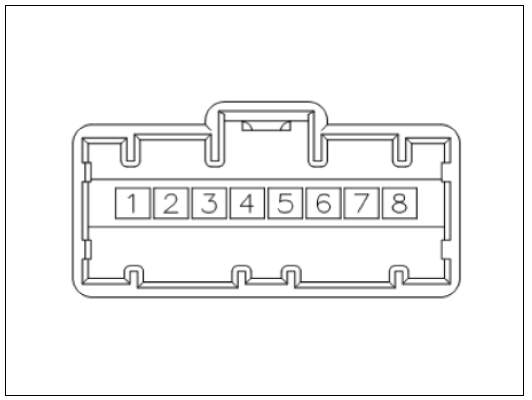
- Auto light signal
- Auto light ground
- Photo signal (RH)
- LED battery (+)
- LED signal
- Photo DRV
- Photo power
- Auto light power
Replacement
- Disconnect the negative (-) battery terminal.
- By using a screw driver or a remover, and remove the photo-sensor (A) and remove the connector (B).
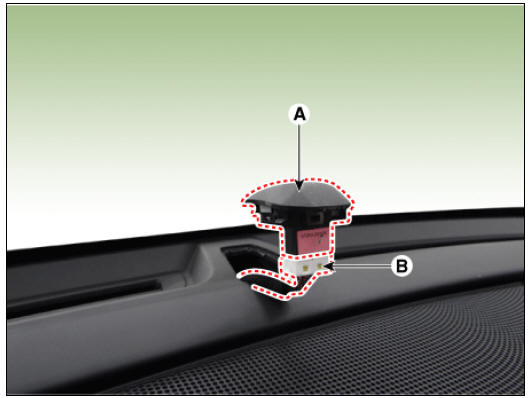
- Install in the reverse order of removal.
READ NEXT:
 Ambient Temperature Sensor | Auto Defogging Sensor
Description
Located at the front of the condenser, the ambient temperature sensor detects the ambient air temperature. It is a negative type thermistor; resistance will increase at lower temperature and decrease at higher temperature.
The sensor
Duct Sensor Repair procedures
Inspection
Check that the voltage between No. 1 and 2 duct sensors change.
Sensor (+ 5V)
Sensor ground
Specification
Replacement
Duct sensor - Floor
Disconnect the negative (-) battery terminal.
Remove the crash pad low
SEE MORE:
Information on data processing
Any processing of personal data through
the 112-based eCall in-vehicle system
shall comply with the personal data protection
rules provided for in Directives
95/46/EC (1) and 2002/58/EC (2) of the
European Parliament and of the Council,
and in
Inlet Temperature Sensor
Inlet Temperature Sensor #1 (Main High Voltage)
Description
The inlet temperature sensor is installed on top of the high voltage battery
module, and it detects the
air temperature inside the battery system assembly.
The inlet temperatur
Categories
- Home
- KIA Niro EV, Hybrid - Second generation - (SG2) (2021-2024) - Owner's manual
- Kia Niro - First generation - (DE) (2017-2022) - Service and Repair Manual
- Contact Us