KIA Niro: Normal charging port
Kia Niro - First generation - (DE) (2017-2022) - Service and Repair Manual / Hybrid Control System / Normal charging port
Removal
Warning
- Be sure to read and follow the "General Safety Information and Caution" before doing any work related with the high voltage system. Failure to follow the safety instructions may result in serious electrical injuries.
- Be sure to read and follow the "High Voltage Shut-off Procedures" before doing any work related with the high voltage system. Failure to follow the safety instructions may result in serious electrical injuries.
- Disconnect the negative (-) battery cable.
- Shut off the high voltage circuit.
(Refer to Hybrid Control System - "High Voltage Shutoff Procedure")
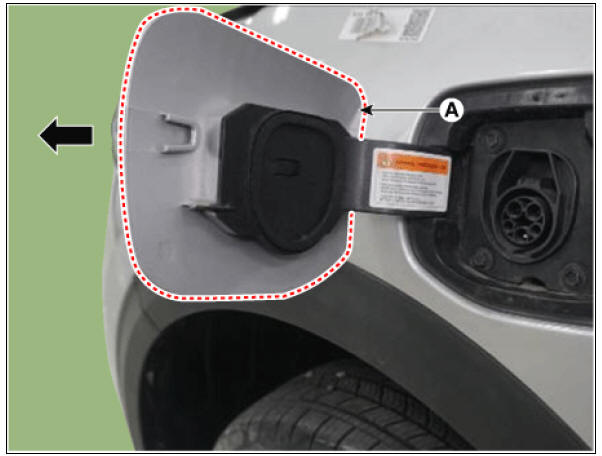
- Remove the door cover (A) by pulling it in the direction of arrow after opening the normal charging port door.
- Remove LH side wheel guard.
(Refer to Body - "Front Wheel Guard")
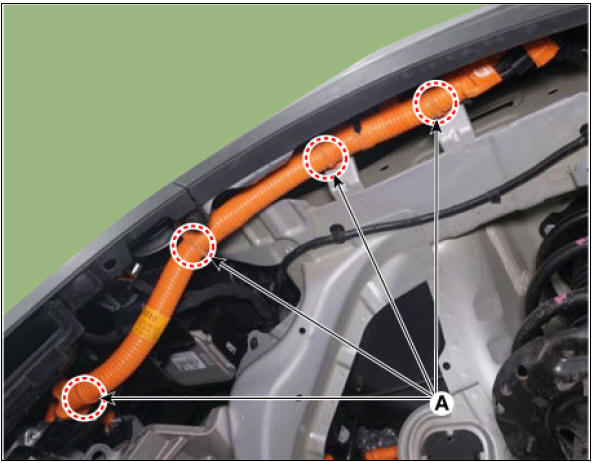
- Separate the normal charging port cable off the fixing clips.
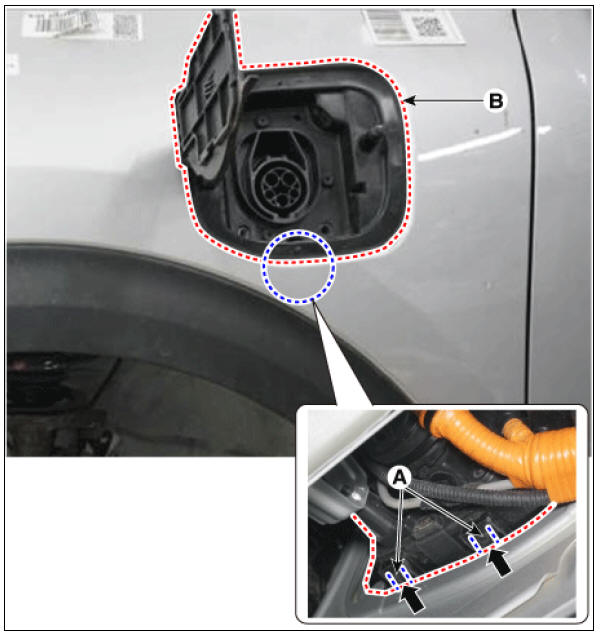
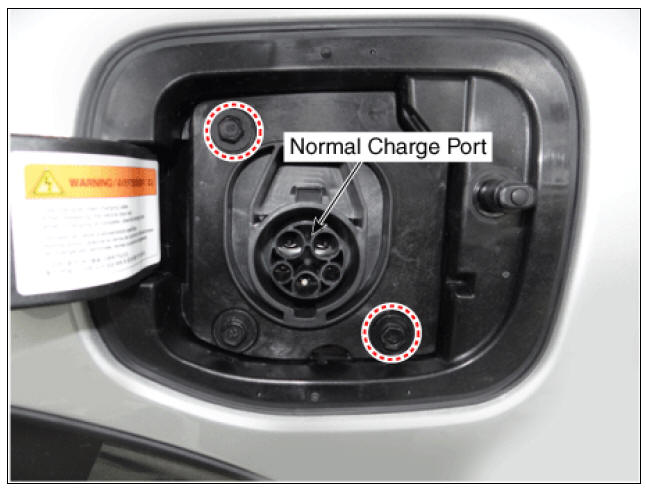
- Remove the cover (A) after loosening normal charging port fixing bolts.
Tightening torque : 9.8 - 11.8 N*m (1.0 - 1.2 kgf*m, 7.2 - 8.7 lb*ft)

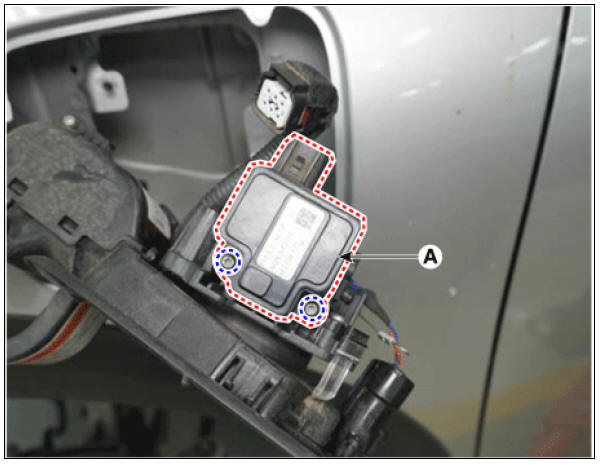
- Release the normal charging port (B) by pressing the fixing pins (A) located inside the port.
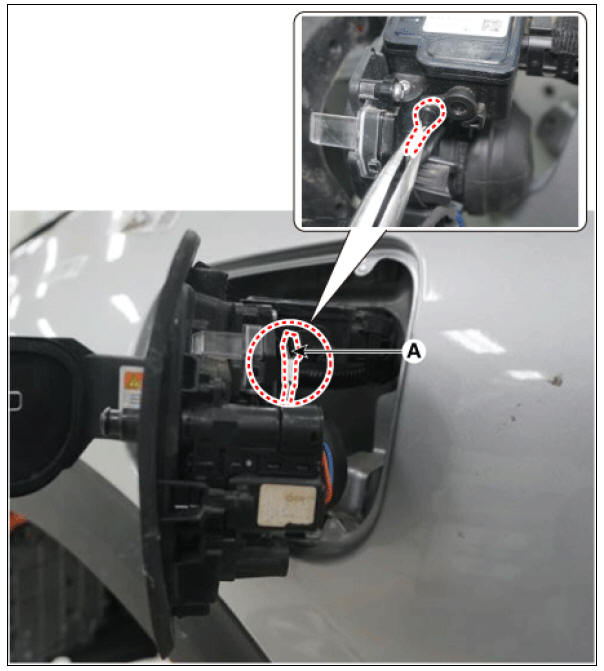
- Remove the emergency release cable (A).
- Disconnect the actuator connector (A).
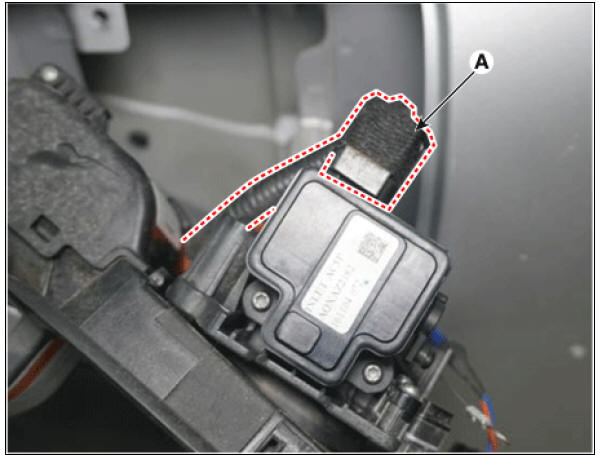
- Remove the actuator (A) by loosening the bolts.
Installation
- Install in the reverse order of removal.
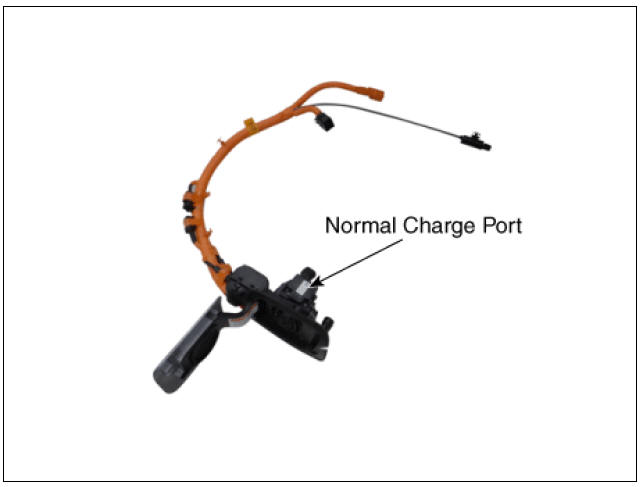
Description
Location of normal charge port in the front fender of vehicle. The charge starts when the ICCB or the is connected to charge port.
READ NEXT:
 Engine Mechanical System
Specifications
Liquid Gasket
Tightening Torques
Warning
Torque - to - yield cylinder head, connecting rod cap and crankshaft
main bearing cap bolts must
be replaced once removed because the bolts are
Compression Pressure Inspection
Warning
If the there is lack of power, excessive oil consumption or poor
fuel economy, measure the compression pressure.
Warm up and stop the engine.
Allow the engine to warm up to normal operating temperature.
Remove the air cleaner.
(R
SEE MORE:
High Voltage Battery System / Components And Components Location / Repair Procedures
Description
The High Voltage Battery System provides the hybrid drive motor, HSG, and electric A/C compressor
with electric energy and also reserves the electric energy generated during regeneration braking.It
consists of the battery pack assemb
Sunroof Assembly | Sunroof Sunshade
Sunroof Assembly
Replacement
Warning
When removing with a flat-tip screwdriver or remover, wrap protective tape around the tools to prevent damage to components.
Put on glove to protect your hands.
Remove the roof
Categories
- Home
- KIA Niro EV, Hybrid - Second generation - (SG2) (2021-2024) - Owner's manual
- Kia Niro - First generation - (DE) (2017-2022) - Service and Repair Manual
- Contact Us