KIA Niro: Sunroof Assembly | Sunroof Sunshade
Kia Niro - First generation - (DE) (2017-2022) - Service and Repair Manual / Body (Interior And Exterior) / Sunroof / Sunroof Assembly | Sunroof Sunshade
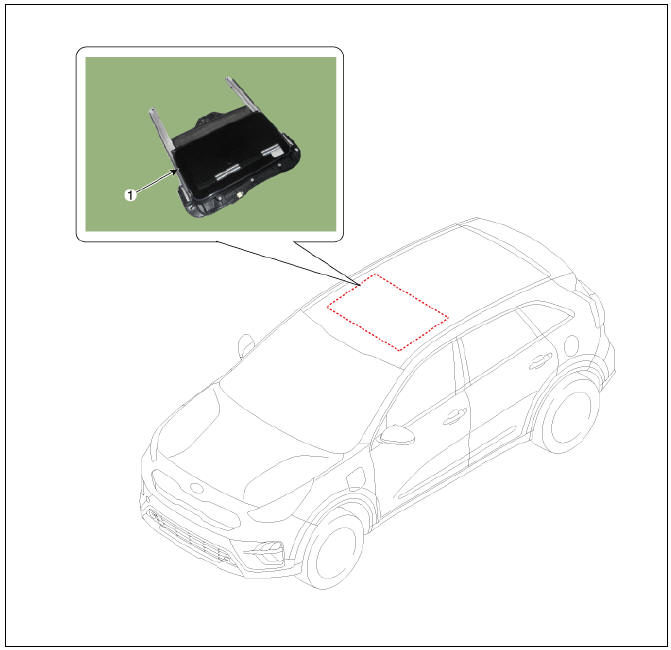
- Sunroof Assembly
Replacement
Warning
- When removing with a flat-tip screwdriver or remover, wrap protective tape around the tools to prevent damage to components.
- Put on glove to protect your hands.
- Remove the roof trim.
(Refer to Roof Trim - "Roof Trim Assembly")
- Remove the sunroof glass.
(Refer to Sunroof - "Sunroof Glass")
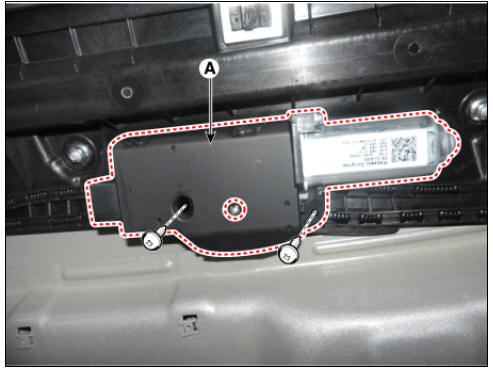
- Loosen the mounting screws and remove the sunroof motor (A).
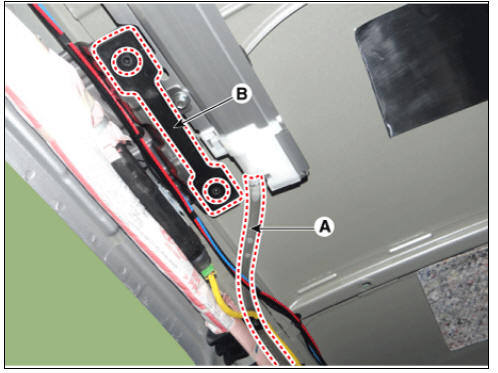
- Remove the drain hose (A) and assist handle guide plate (B).
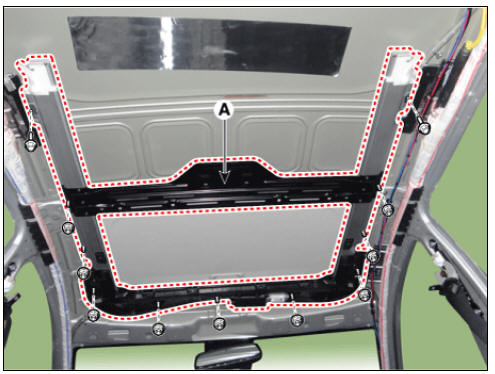
- Remove the sunroof assembly (A) after loosening the nuts and bolts.
Tightening torque :
Bolt : 7.8 - 11.8 N*m (0.8 - 1.2 kgf*m, 5.8 - 8.7 lb*ft)
Nut : 3.9 - 5.9 N*m (0.4 - 0.6 kgf*m, 2.9 - 4.3 lb*ft)
- Install in the reverse order of removal.
Warning
Make sure to initialize the motor.
Sunroof Sunshade
Replacement
- Remove the sunroof assembly.
(Refer to Sunroof - "Sunroof Assembly")
- Remove the drip rail assembly (A) after loosening the mounting screws.
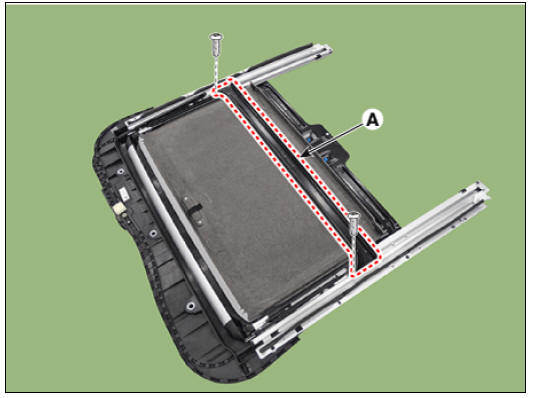
- Separate the rear drip (A) after loosening the mounting screws.
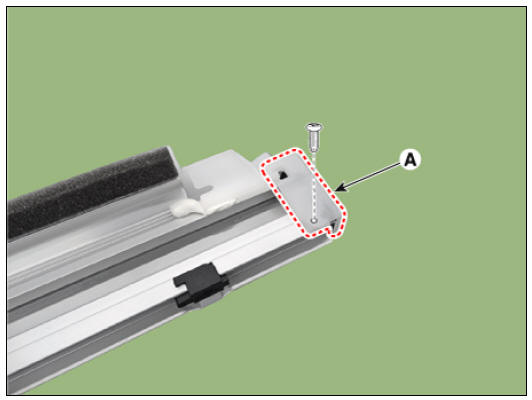
- Remove the stopper (A) by pushing it in the direction of the arrow.
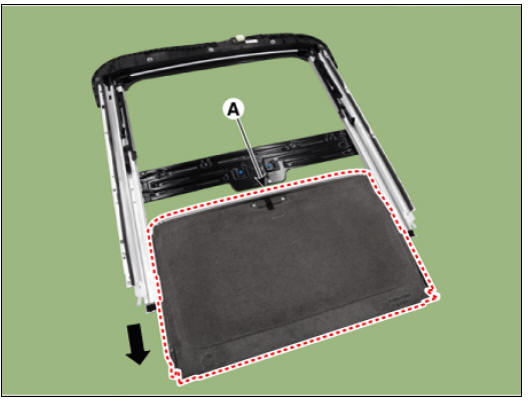
- Remove the sunroof sunshade (A) by pushing it backward.
- Install in the reverse order of removal.
Warning
Make sure to initialize the motor.
READ NEXT:
 Sunroof Guide
Replacement
Remove the sunroof assembly.
(Refer to Sunroof - "Sunroof Assembly")
Remove the sunroof sunshade.
(Refer to Sunroof - "Sunroof Sunshade")
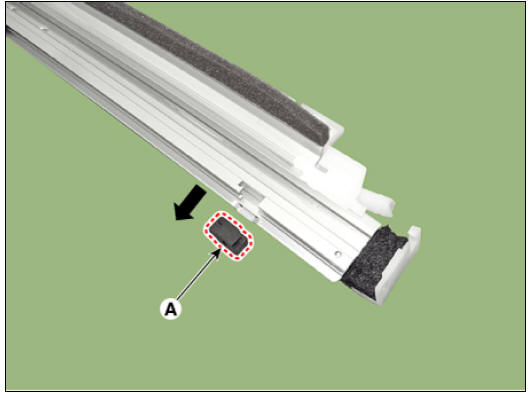
Push down the slide and remove the drip link assembly (A).
Quarter Fixed Glass
Quarter fixed glass
Replacement
Remove the rear pillar trim.
(Refer to Interior Trim - "Rear Pillar Trim")
Loosen the quarter fixed glass (A) mounting nuts.
Tightening torque :
3.9 - 4.4 N*m (0.4 - 0.45 kgf*m, 2.9 - 3.
SEE MORE:
Room Lamp Repair procedures | Vanity Lamp Repair procedures
Removal
Warning
Put on gloves to prevent hand injuries.
When removing with a flat-tip screwdriver or remover, wrap protective tape around the tools to prevent damage to components.
Disconnect the negative (-) battery terminal
Pre-Charge Relay
Specification
Description
The Power Relay Assembly (PRA) consists of the positive and negative main
relays, pre-charge relay, pre-charge resistor and
battery current sensor. It is located inside the battery pack assembly and
controls the h
Categories
- Home
- KIA Niro EV, Hybrid - Second generation - (SG2) (2021-2024) - Owner's manual
- Kia Niro - First generation - (DE) (2017-2022) - Service and Repair Manual
- Contact Us