KIA Niro: Oil Level Check
- Remove the under cover.
(Refer to Engine Mechanical System - "Engine Room Under Cover")
- Remove the oil filler plug (A or B).
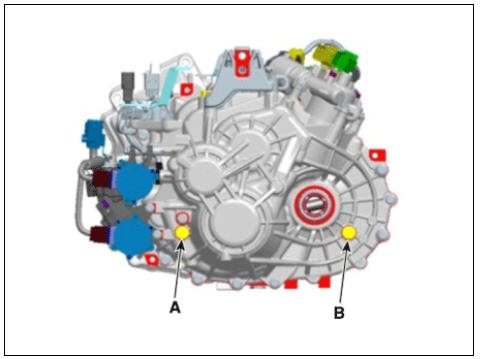
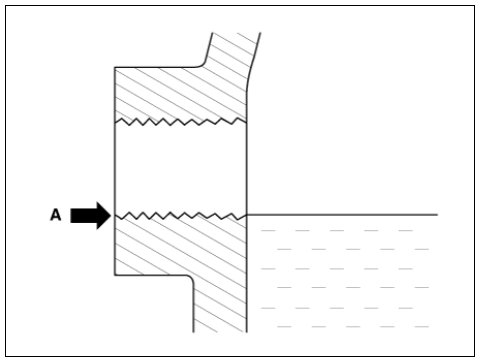
- Check the condition of the oil and make sure that it is at the proper level (A).
- Install the oil filler plug (A).
Tightening torque : 58.9 - 78.5 N*m (6.0 - 8.0 kgf*m, 43.4 - 57.8 lb*ft)
Warning
The existing oil filler plug gasket must be replaced with a new one. (Do not reuse it.)
- Install the under cover.
(Refer to Engine Mechanical System - "Engine Room Under Cover")
Inspection
Check the brake fluid level in the brake fluid reservoir. The level should be
between "MIN" and
"MAX" marks on the side of the reservoir.
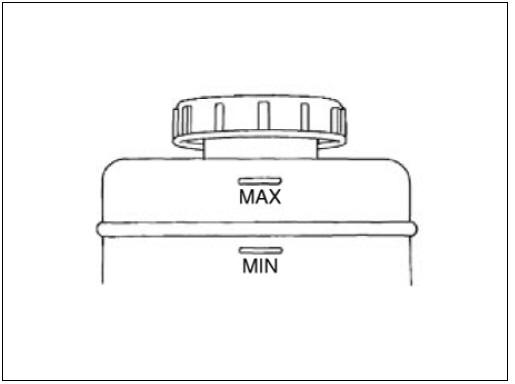
Use only hydraulic brake fluid conforming to DOT 3 or DOT 4 specification.
Check the brake system for any leakage if the fluid level is extremely low (lower than MIN).
Inspection
Visually check for proper installation, chafing, cracks, deterioration and any leakage.
Replace any deteriorated or damaged parts immediately.
READ NEXT:
 Front Brake
Inspection
Check the pads for excessive wear, discs for run out and wear, and calipers
for fluid leakage.
Front brake disc thickness check
Check the brake pads for wear and fade.
Check the brake disc for damage and cracks.
Remove all rust
Rear Brake
Rear Brake Disc Thickness Check
Check the brake pads for wear and fade.
Check the brake disc for damage and cracks.
Remove all rust and contamination from the surface, and measure the disc
thickness at 8 points, at least, of
same distanc
Tire Rotation
Inspection
Check the tire pressure.
16(inch) : 2.5kg/cm²(36psi)
18(inch) : 2.5kg/cm²(36psi)
Tire Rotation
Checking For Pull And Wander
If the steering pulls to one side, rotate the tires according to the
following wheel rotation pr
SEE MORE:
Checking the tire
pressure
Tire Pressure Monitoring System (TPMS) (if equipped)
Low tire pressure telltale /TPMS malfunction
indicator
Low tire pressure position telltale
(Shown on the LCD display)
Check tire pressure
You can check the tire pressure in the
Hybrid Motor Control System
Description
The Hybrid Power Control Unit (HPCU), composed of various components, is
the core device among the Power Electronics
devices that acts as the brain.
It comprises of the Hybrid Control Unit (HCU), an inverter Motor Control
Un
Categories
- Home
- KIA Niro EV, Hybrid - Second generation - (SG2) (2021-2024) - Owner's manual
- Kia Niro - First generation - (DE) (2017-2022) - Service and Repair Manual
- Contact Us