KIA Niro: Resolver Sensor Repair procedures | Motor Temperature Sensor Repair procedures
Inspection
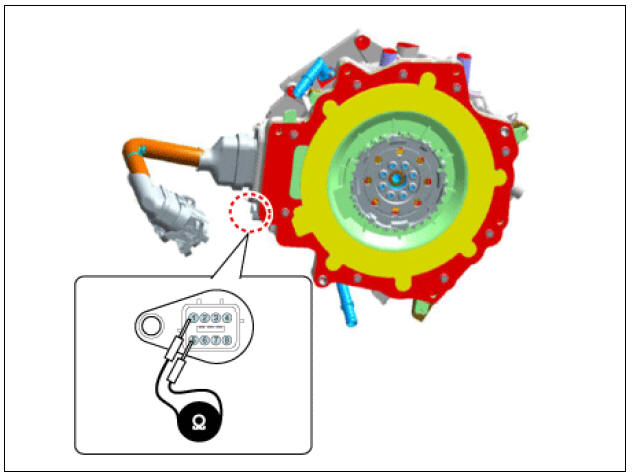
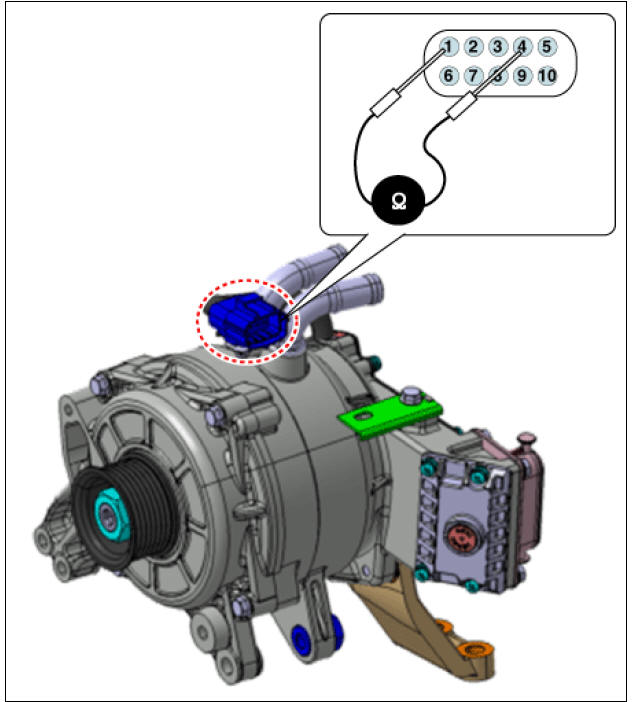
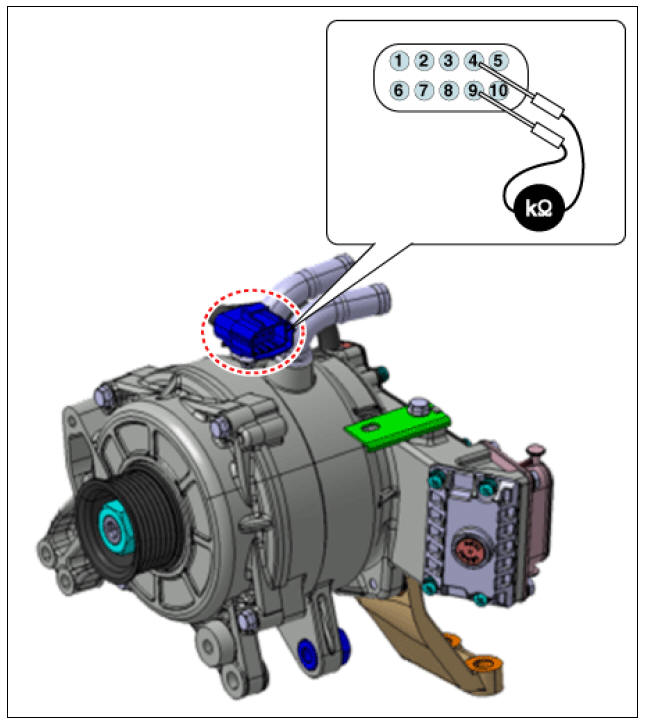
Hybrid Drive Motor
- Inspect the resolver sensor resistance.

- If the resolver sensor needs to be replaced, replace the hybrid drive motor assembly.
(Refer to Hybrid Motor Assembly - "Hybrid Drive Motor Assembly")
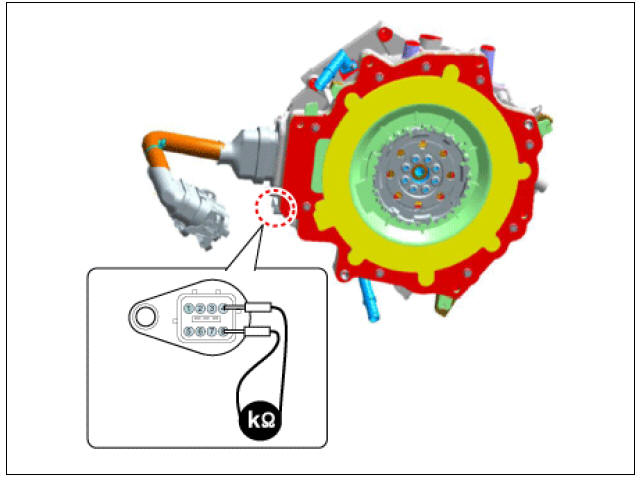
Hybrid Starter Generator (HSG)
- Inspect the resolver sensor resistance.

- If the resolver sensor needs to be replaced, replace the HSG assembly.
(Refer to Hybrid Motor Assembly - "Hybrid Starter Generator")
Resolver Calibration
Perform the resolver calibration using the KDS after replacing or reinstalling the below components.
- Hybrid Drive Motor installation
- Hybrid Starter Generator (HSG) installation
- Motor Control Unit (MCU) replacement
- Engine clutch system replacement
Motor Temperature Sensor Repair procedures
Description
Temperature of the motor largely influences the motor output. Hence, when the motor is overheated,
major components such as the IPM or stator coil may get damaged or affected. To prevent this, a
motor temperature sensor is embedded in the motor to control the motor torque according to its
temperature.
Part Circuit Diagram
Hybrid Drive Motor
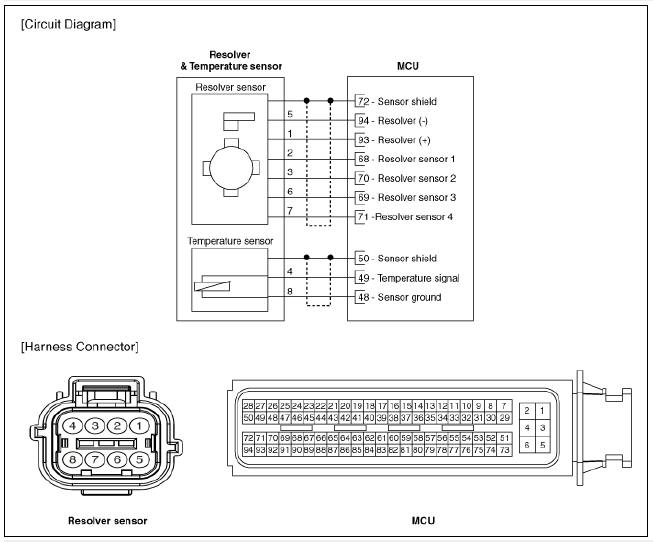
HSG
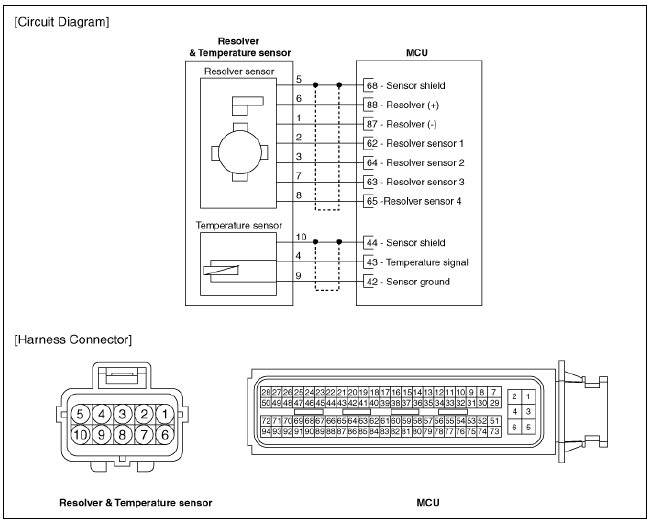
Motor Temperature Sensor Repair procedures
Inspection
Hybrid Drive Motor
- Inspect the temperature sensor resistance.

- If the temperature sensor needs to be replaced, replace the hybrid drive motor assembly.
(Refer to Hybrid Motor Assembly - "Hybrid Drive Motor Assembly")
Hybrid Starter Generator (HSG)
- Inspect the temperature sensor resistance.

- If the temperature sensor needs to be replaced, replace the HSG assembly.
(Refer to Hybrid Motor Assembly - "Hybrid Starter Generator")
READ NEXT:
 Electric Water Pump (EWP) Repair procedures
Description
The Hybrid Power Control Unit (HPCU) uses various semiconductors that are
supplied with high voltage, hence generating
more heat than engine combustion devices. Overheating can decrease the
efficiency of control devices, restrict pr
SEE MORE:
Crankshaft Repair procedures
Disassembly
Warning
Be sure to read and follow the "General Safety Information and
Caution" before doing any work related with
the high voltage system. Failure to follow the safety instructions may
result in serious electrical injuries.
Remote Operation
Operating order
Remote Operation operates in the following
order:
Getting ready to remotely move forward
and backward
Remotely moving forward and backward
1. Getting ready to remotely move forward and backward
There are two ways t
Categories
- Home
- KIA Niro EV, Hybrid - Second generation - (SG2) (2021-2024) - Owner's manual
- Kia Niro - First generation - (DE) (2017-2022) - Service and Repair Manual
- Contact Us