KIA Niro: TPMS Sensor Repair procedures
Kia Niro - First generation - (DE) (2017-2022) - Service and Repair Manual / Suspension System / Tire Pressure Monitoring System / TPMS Sensor Repair procedures
Removal
- Remove the valve core and deflate the tire.
- Remove the side of the tire bead area from the wheel using tire changing machine .
Warning
- The tire bead should be broken approx. 90º from the valve side of the wheel. The bead breaker should not be set too deep.
- Avoid tire/tool contact with the valve on dismount.
- Dismount should end near the valve.
- Rotate the wheel clockwise.
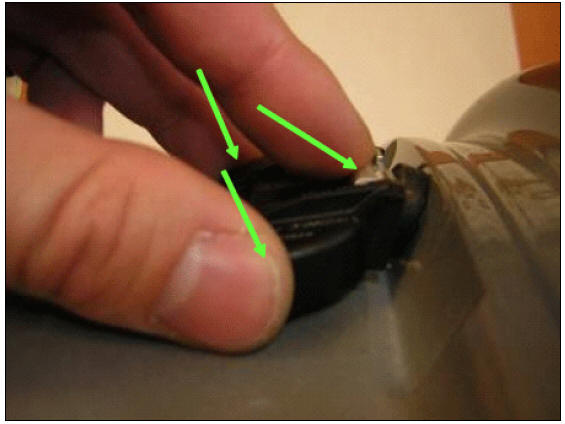
- Check for deviation of the valve (air inlet portion in silver) during transportation and assemble the valve in the indented state from the original position (metal brackets).
- To prevent the valve from rotating and deviating the set position while the nut is being tightened, push the valve into the set position (inside the metal brackets). Tigthen to the specified torque (8 Nm) and do not reuse the nut.
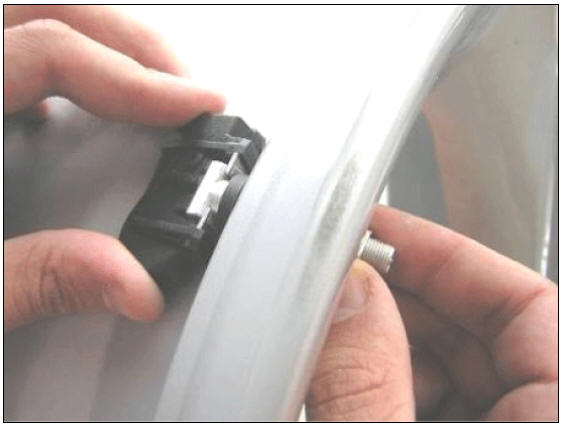
- Push the valve into the valve hole so that the seal washer touches the rim.
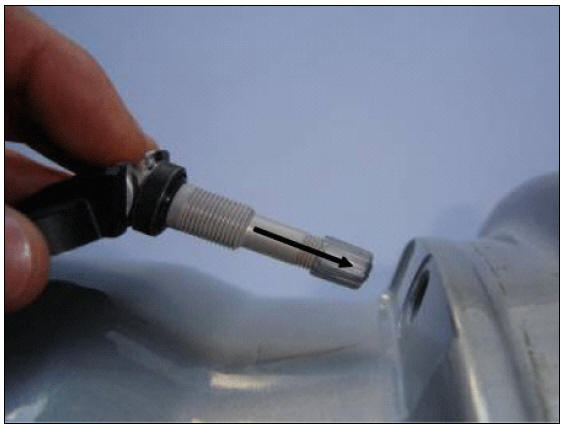
- While holding the housing with two fingers, push in the valve in the axial direction with another finger.

- The housing laser marking should be visible.
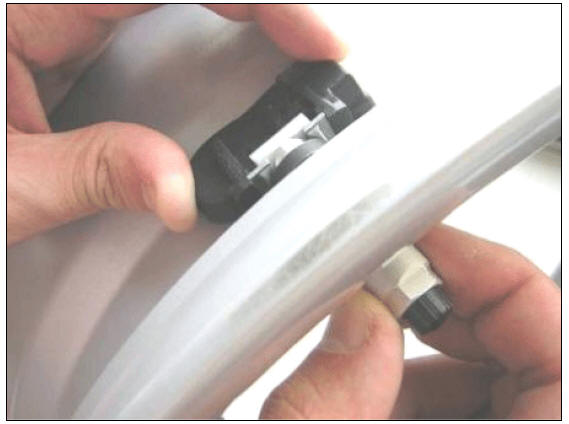
- When the valve is fully inserted, start tightening the nut several times by hand while keeping the sensor contacting the rim.
- Mount the nut using a tool while maintaining the position of the valve and the sensor.
- Apply tire soap or lubrication to the top and bottom tire beads
- To fit the bottom bead, position the sensor at the 5 o'clock position relative to the head on the tire changing machine.
- Place the tire on the rim so the bottom bead touches the edge of the rim past the sensor (@6 o'clock). Rotate the rim clockwise, and push down on the tire at the 3 o'clock position to fit bottom bead.
- After bottom bead is on tire, rotate the rim until the sensor is at the 5 o'clock position relative to the head on the tire changing machine. Push down on the tire at the 3 o'clock position and rotate the rim clockwise to fit the top bead.
- Inflate the tire until both beads seat.
- In case of TPMS sensor failure, TPMS sensor learning is needed. After replacing faulty sensor with a new unit, perform TPMS sensor learning.
Inspection
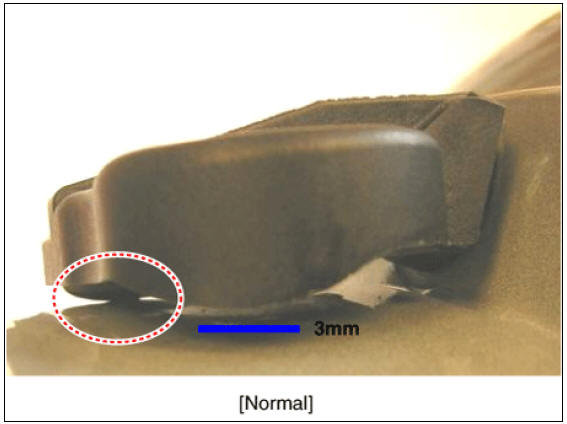
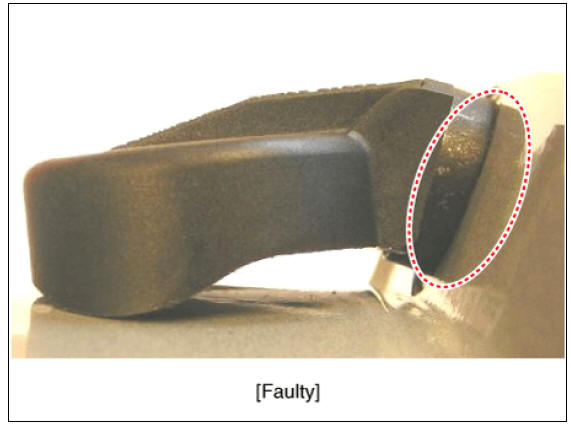
Inspection after installing TPMS sensor
- Seal washer must be compressed on the outer surface of rim hole.
- The lower part of the valve must be locate in the set position (within metal bracket) of the housing.
- One or more points of the housing must be contacting the surface of the rim.
- The mounting height of the housing must not exceed the sill of the rim.
Diagnosis procedure by using diagnostic device
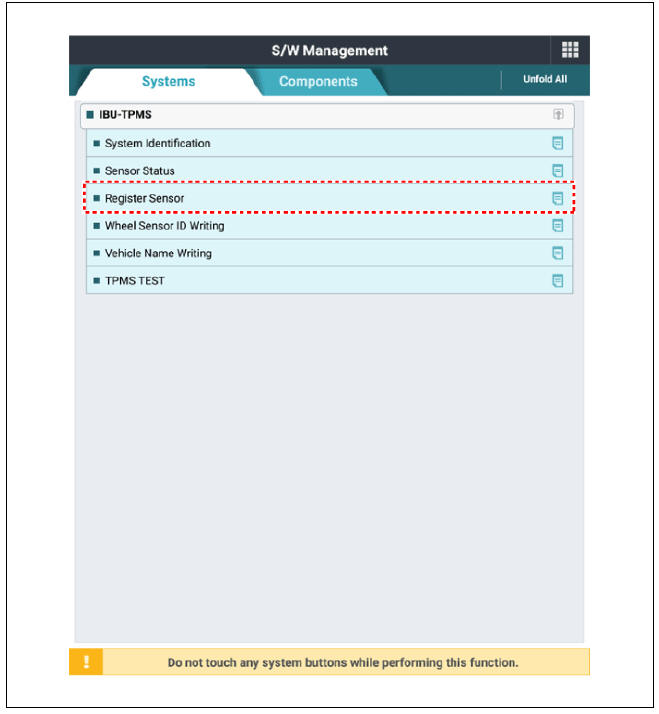
Register Sensor Method
- Connect self-diagnosis connector (16pins) located under the driver side crash pad to self-diagnosis device, and then turn the self-diagnosis device after key is ON.
- Select the "vehicle model" and "IBU-TPMS" on KDS vehicle selection screen.
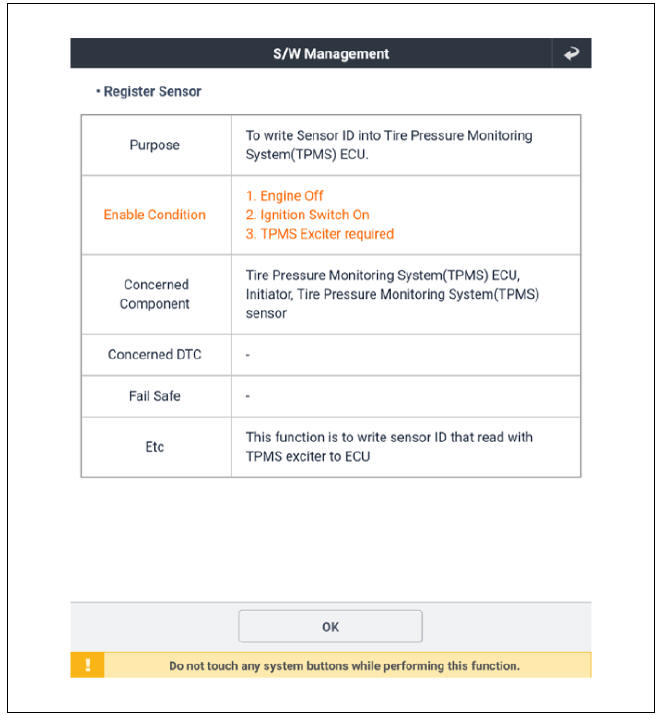
- Select the "Register Sensor" on KDS screen, then select OK.
- Proceed with the test according to the screen instructions.
Warning
- Check that Write ID and Read ID are the match.
- After successfully registering the sensor, perform "Sensor Wireless Information" to confirm that the sensor operates properly.
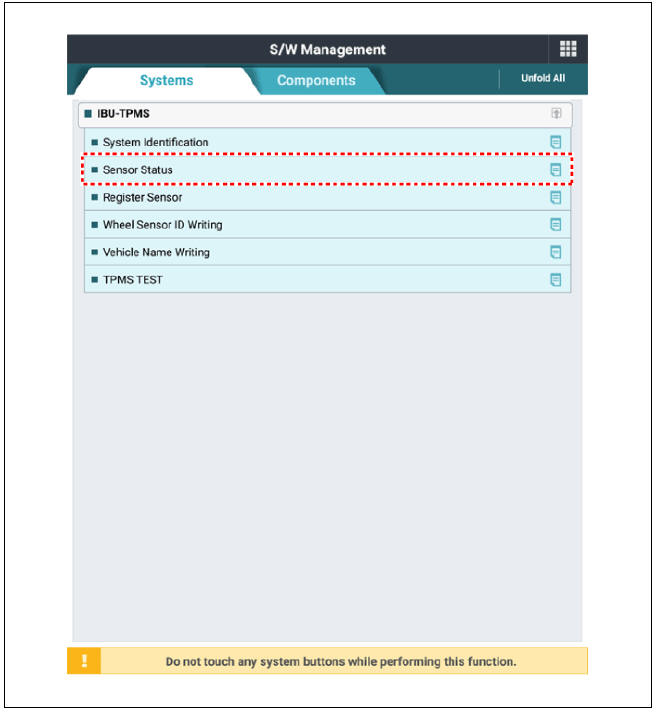
Sensor Status Method
- Connect self-diagnosis connector (16pins) located under the driver side crash pad to self-diagnosis device, and then turn the self-diagnosis device after key is ON.
- Select the "vehicle model" and "IBU-TPMS" on KDS vehicle selection screen.
- Select the "Sensor Status" on KDS screen, then select OK.
- Proceed with the test according to the screen instructions.
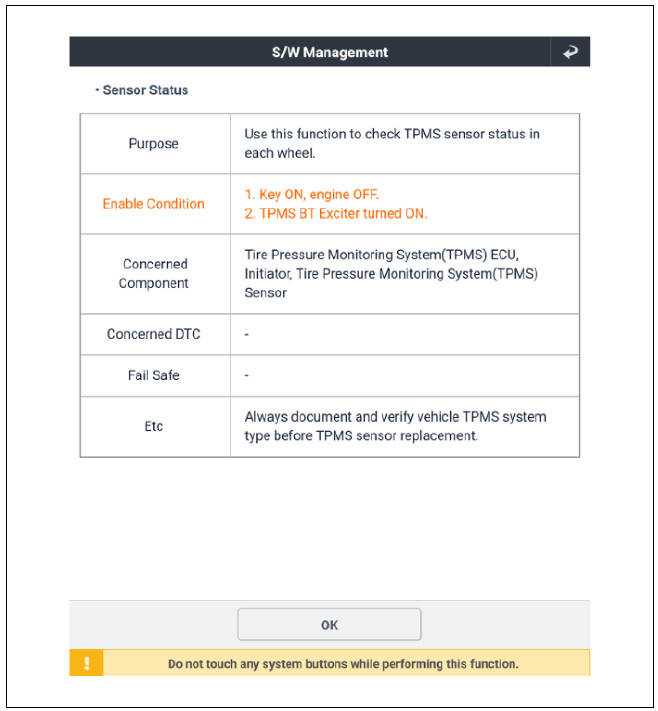
Warning
- Each entry must be checked for normal operation of each sensor.
- After replacing the tires or sensors, check for proper operation of sensor after sensor registration process.
TPMS Receiver Description and operation
Operation
- General Function
- Auto-learn takes place only once per Ignition cycle.
- On successful completion, 4 road wheel sensor ID's are latched into memory for monitoring.
- Until Auto-learn completes, previously learned sensors are monitored for under inflation / leak warnings
- General Conditions to Learn New Sensors:
- Receiver must determine that it is confident that sensor is not temporary:
- Uses vehicle speed.
- Uses confidence reduction of previously learned sensors.
- Typical time of driving continuously at over 15.5 mph (25 km/h) to learn a new sensor is up to 20 minutes.
- General Conditions to Un-Learn a sensor that is removed :
- It takes less than 20 minutes at 15.5 mph (20 - 30 km/h).
- Confidence reduction is dependent on time during which vehicle is driven at speed greater than or equal to 12.4 mph (20 - 30 km/h).
READ NEXT:
 TPMS Receiver Repair procedures
Removal
Disconnect the battery negative cable.
Remove the glove box.
(Refer to Body - "Glove Box Housing")
Disconnect the blower motor connector (A).
Disconnect the body control module (BCM) connector (A).
Loos
Steering System / Repair Procedures
Service Data
Tightening Torques
Service Adjustment procedure
Steering Wheel Play Inspection
Turn the steering wheel so that the front wheels are facing straight
ahead.
Measure the distance that the steering wheel can be turned wit
SEE MORE:
Power Door Locks
Power Door Locks / Components And Components Location
Driver power window switch
Assist power window switch
Integrated Gateway & Power control Module (IGPM)
Door lock knob
Tailgate latch assembly
Door latch assembly
Door lock/
Fuel Pressure Test (Low pressuresystem)
Release the residual pressure in fuel line.
(Refer to the Fuel Delivery System - Inspection - "Release Residual Pressure
in Fuel Line").
Warning
When removing the fuel pump fuse, a Diagnostic Trouble Code (DTC)
may occur. De
Categories
- Home
- KIA Niro EV, Hybrid - Second generation - (SG2) (2021-2024) - Owner's manual
- Kia Niro - First generation - (DE) (2017-2022) - Service and Repair Manual
- Contact Us