KIA Niro: Timing Chain Repair procedures
Removal
Warning
- Be sure to read and follow the "General Safety Information and Caution" before doing any work related with the high voltage system. Failure to follow the safety instructions may result in serious electrical injuries.
- Be sure to shut off the high voltage circuit according to the "High Voltage Shut-off Procedures" before doing any work related with the high voltage system to avoid serious electrical injuries.
- Shut off the high voltage circuit.
(Refer to Engine Mechanical System - "High Voltage Shut off Procedure")
- Remove the cylinder head cover.
(Refer to Cylinder Head Assembly - "Cylinder Head Cover")
- Set No.1 cylinder to TDC (Top dead center) on compression stroke.
(1) Turn the crankshaft pulley and align its groove with the timing mark of the timing chain cover.
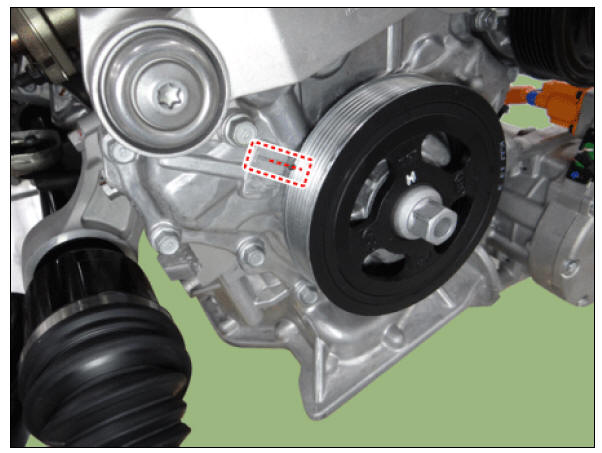
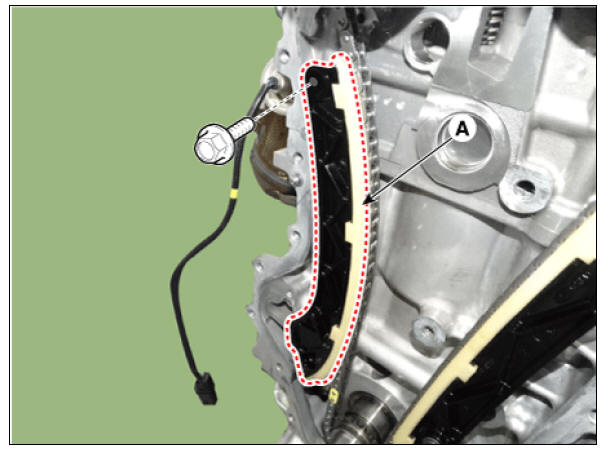
(2) Remove the timing chain cover.
(Refer to Timing System - "Timing Chain Cover")
(3) Before removing the timing chain, mark the timing chain with an identification based on the location of the sprocket because the identification mark on the chain for TDC (Top Dead Center) can be erased.
- Remove the timing chain cover.
(Refer to Timing System - "Timing Chain Cover")
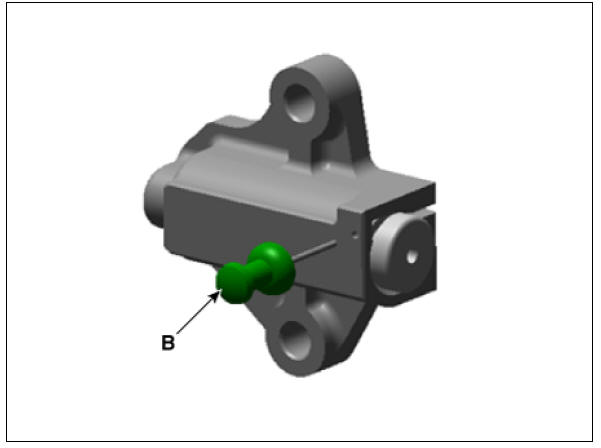
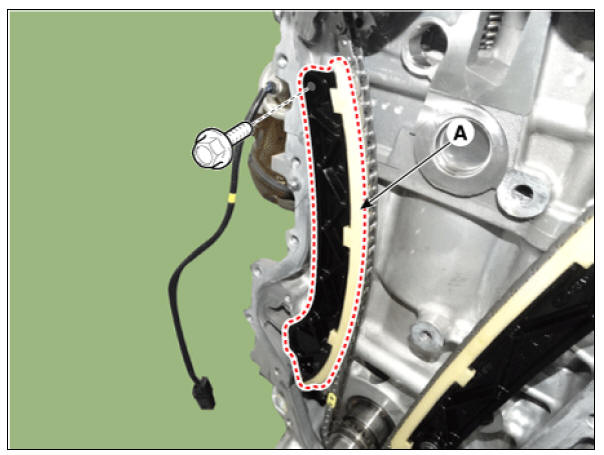
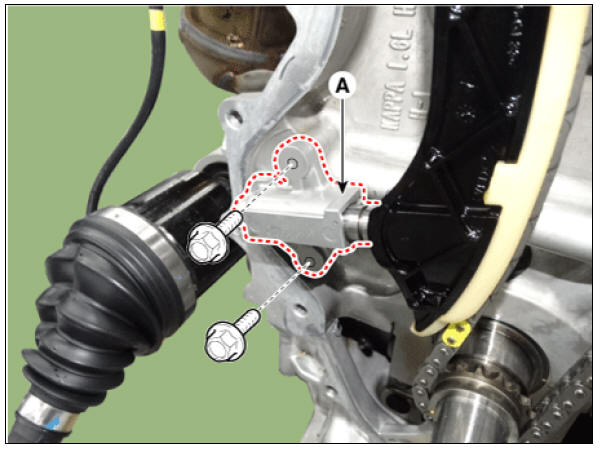
- Remove the timing chain tensioner (A).
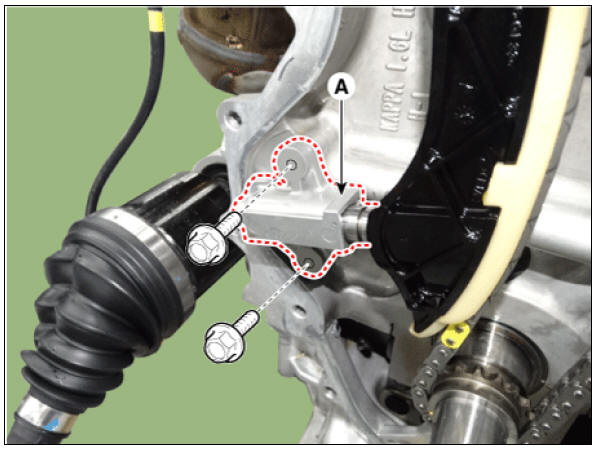
Warning
- Do not reuse the detached tensioner.
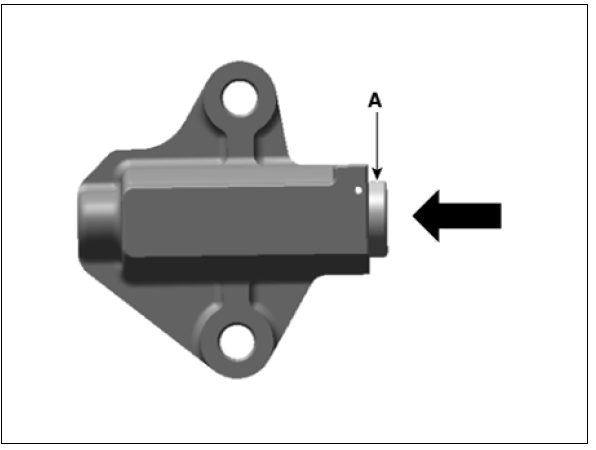
- To reuse the tensioner, remove it, make the piston (A) to
protrude to the maximum, push the piston
(A) to the end, and then mount the stopper pin (B).
- Remove the timing chain tensioner arm (A).
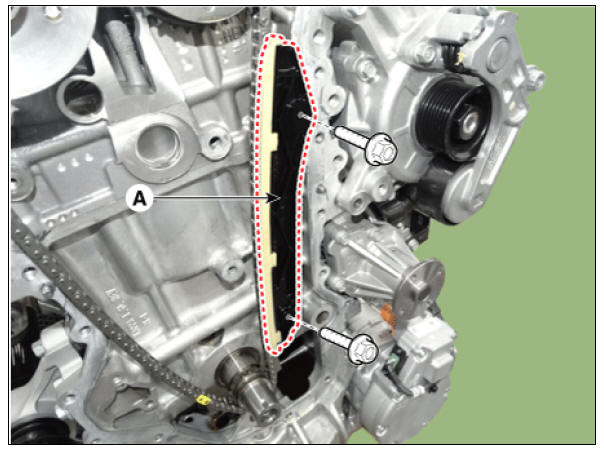
- Remove the timing chain guide (A).
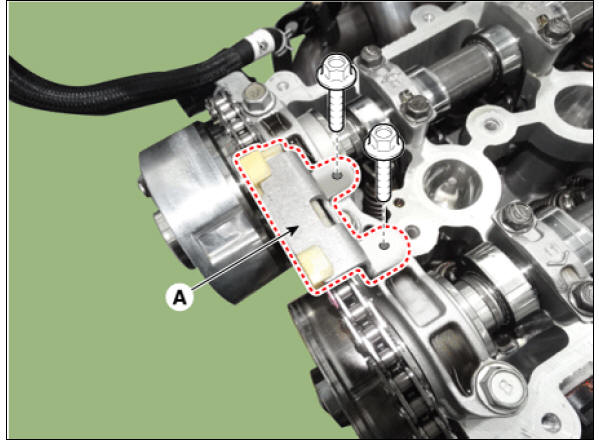
- Remove the timing chain cam guide (A).
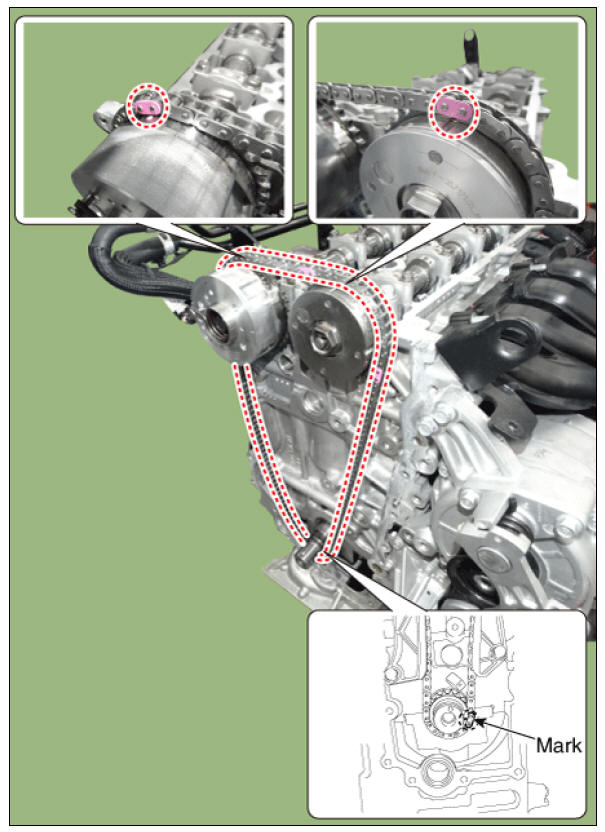
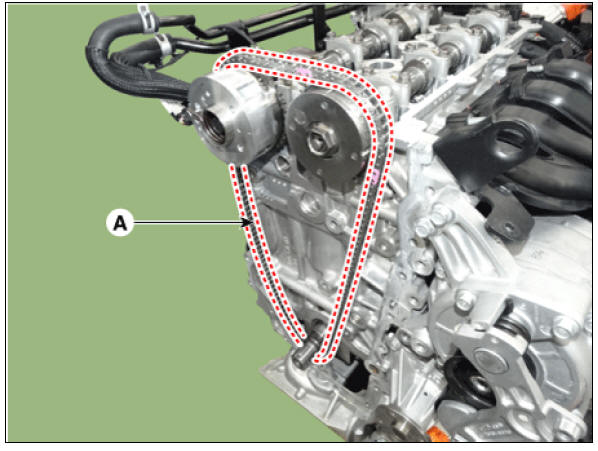
- Remove the timing chain (A).
Inspection
Sprockets, Chain Tensioner, Chain Guide, Chain Tensioner Arm
- Check the CVVT sprocket and crankshaft sprocket for abnormal wear, cracks, or damage. Replace if necessary.
- Inspect the tensioner arm and chain guide for abnormal wear, cracks, or damage. Replace if necessary.
- Check that the tensioner piston moves smoothly.
Installation
- Install the timing chain.
Crankshaft sprocket → Intake CVVT sprocket → Exhaust CVVT sprocket Install the timing chain with no slack between the crankshaft sprocket and the intake CVVT sprocket.
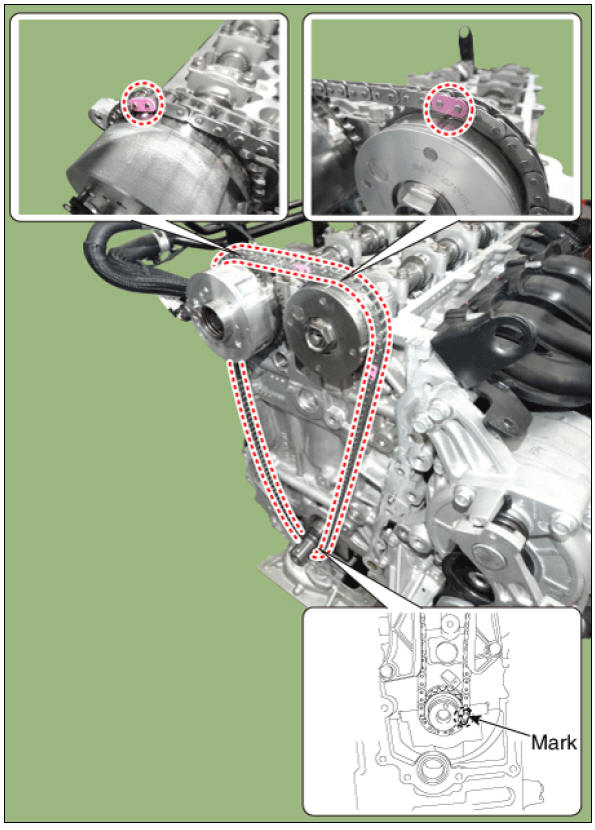
Warning
The timing marks of each sprocket should be matched with timing marks (color link) of timing chain when installing the timing chain
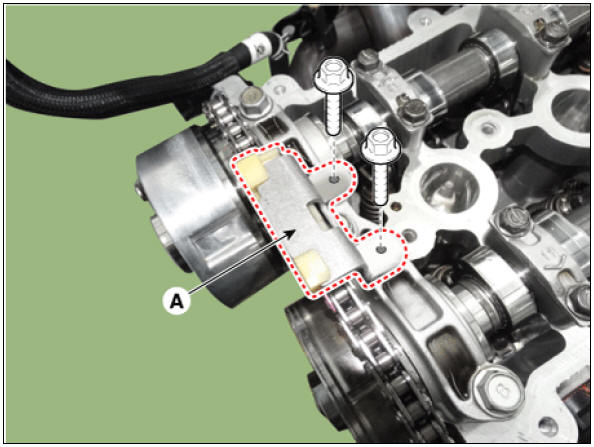
- Install the timing chain cam guide (A).
Tightening torque : 9.8 - 11.8 N*m (1.0 - 1.2 kgf*m, 7.2 - 8.7 lb*ft)
- Install the timing chain guide (A).
Tightening torque : 9.8 - 11.8 N*m (1.0 - 1.2 kgf*m, 7.2 - 8.7 lb*ft)
- Install the timing chain tensioner arm (A).
Tightening torque : 9.8 - 11.8 N*m 1.0 - 1.2 kgf*m, 7.2 - 8.7 lb*ft)
- Install the timing chain auto tensioner (A) and remove the stopper pin.
Tightening torque : 9.8 - 11.8 N*m (1.0 - 1.2 kgf*m, 7.2 - 8.7 lb*ft)
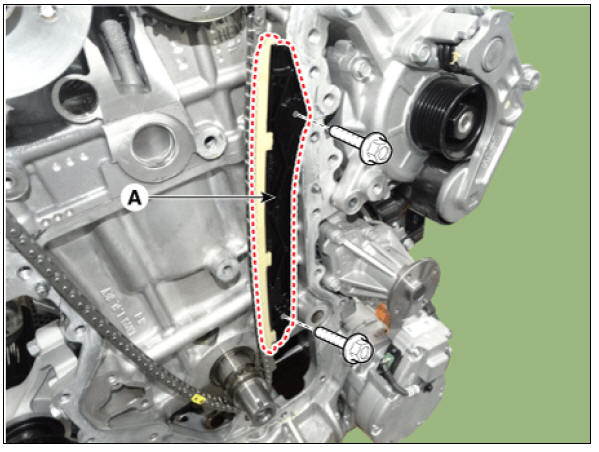
- Install the timing chain cover.
(Refer to Timing System - "Timing Chain Cover")
- Install the cylinder head cover.
(Refer to Cylinder Head Assembly - "Cylinder Head Cover")
- Add all the necessary fluids and check for leaks. Connect KDS. Check for codes, note, and clear. Recheck.
Warning
- Refill engine with engine oil.
- Clean battery posts and cable terminals and assemble (12 Volt only).
- Inspect for fuel leakage.
- After assembling the fuel line, switch on the ignition (without operating the starter) so that the fuel pump runs for approximately two seconds and fuel line pressurizes.
- Repeat this operation two to three times, then check for fuel leakage at any point in the fuel line.
READ NEXT:
 Service Data
Ignition System
Ignition Coil
Spark Plug
Charging System
Battery
CMF45L-DIN
Warning
Model type description
Cold Cranking Ampere (CCA): Cold Cranking Amps is a rating used
in the battery industry to
define a battery's a
Engine Electrical System - Troubleshooting
Trouble Shooting
Ignition System
Symptom:
Vehicle indicates Ready in
dash, but engine will not run
when requested by the
HPCU (HEV module).
Suspect area → Remedy
Ignition coil → Inspect ignition coil, or
replace a
SEE MORE:
Lane-change side function/ Lane-change oncoming function (Kia Niro EV)
Lane-change oncoming function
(if equipped)
Warning and control
The Lane-change oncoming function is
warned and controlled by the following
level.
Collision warning
Emergency steering
Collision warning
A: Collision Warning!
Collis
Precautions to take before servicing high voltage system
Warning
Hybrid vehicles have high voltage batteries. Incorrect handling of
high voltage system or vehicle may lead to serious
accident including electric shock and electric leakage.
Warning
Be sure to shut off the high voltage by removing th
Categories
- Home
- KIA Niro EV, Hybrid - Second generation - (SG2) (2021-2024) - Owner's manual
- Kia Niro - First generation - (DE) (2017-2022) - Service and Repair Manual
- Contact Us