KIA Niro: Engine Oil Level
Warning
Be sure that the vehicle is on level ground.
- Warm up and stop the engine, and then wait for 5 minutes.
- Turn the engine off and wait for a few minutes (about 5 minutes) for the oil to return to the oil pan.
- Pull the dipstick out, wipe and re-insert it fully.
- Check that the oil level is between the "L" level mark and "F" level mark on the engine oil level gauge.
- If the level is low, check for leakage and add oil up to the full level mark.
Warning
Use a funnel to help prevent oil from being spilled on engine components.
Warning
Do not fill the engine with oil to above the full level mark.
Engine Oil Appearance
- Check engine oil for white turbidity or heavy contamination.
- If engine oil becomes turbid and white, it is highly probable that it is
contaminated with engine coolant.
Repair or replace damaged parts.
Replacement
Warning
- Prolonged and repeated contact with mineral oil will result in the removal of natural fats from the skin, leading to dryness, irritation and dermatitis. In addition, used engine oil contains potentially harmful contaminants which may cause skin cancer.
- Exercise caution in order to minimize the length and frequency of contact of your skin to used oil. Wear protective clothing and gloves. Wash your skin thoroughly with soap and water, or use water-less hand cleaner, to remove any used engine oil. Do not use gasoline, thinners, or solvents.
- In order to preserve the environment, used oil and used oil filter must be disposed of only at designated disposal sites.
- Park the car on level ground.
- Drain engine oil.
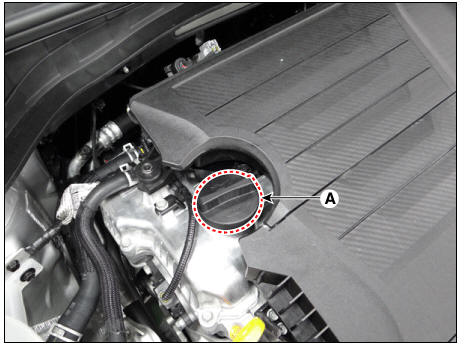
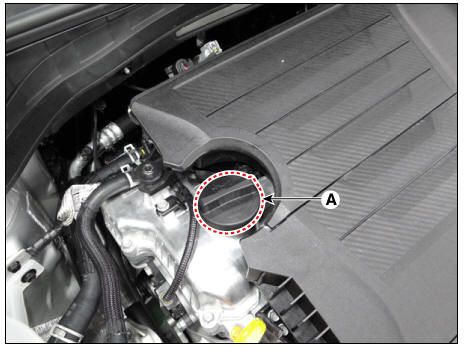
(1) Remove the oil filler cap (A).
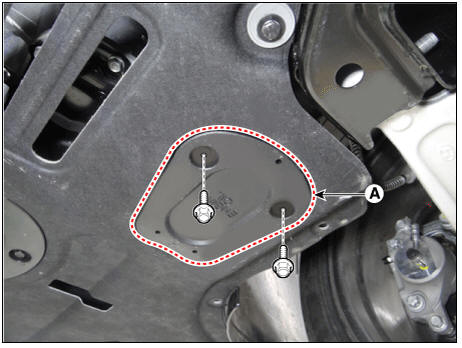
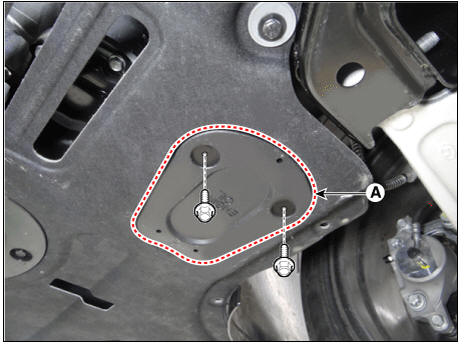
(2) Remove the drain under cover (A).
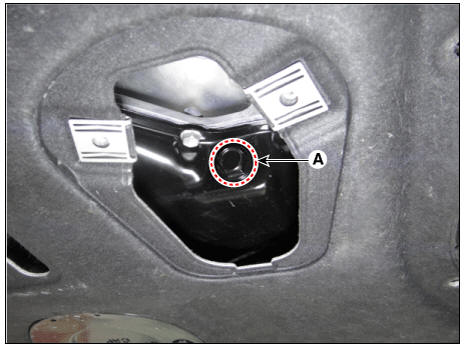
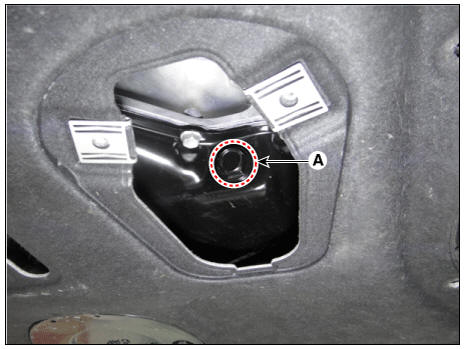
(3) After lifting the car, remove the oil drain plug (A) and drain oil into a container.
- Replace the oil filter.
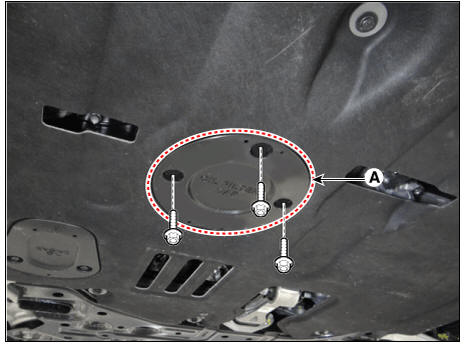
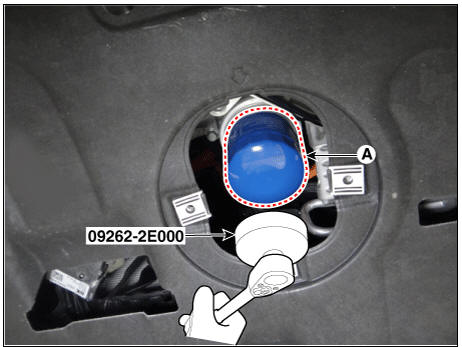
(1) Remove the oil filter cover (A).
(2) Using the SST (09263-2E000), remove the oil filter (A).
(3) Check and clean the oil filter installation surface.
(4) Check the part number of the new oil filter is as same as old one.
(5) Apply clean engine oil to the gasket of a new oil filter.
(6) Lightly screw the oil filter into place, and tighten it until the gasket contacts the seat.
(7) Tighten it with the torque below.
Tightening torque : 11.8 - 15.7 N*m (1.2 - 1.6 kgf*m, 8.7 - 11.6 lb*ft)
(8) Install the oil filter cover (A).

- Refill with the engine oil.
(1) Install the oil drain plug with a new gasket (A).
Tightening torque : 34.3 - 44.1 N*m (3.5 - 4.5 kgf*m, 25.3 - 32.5 lb*ft)
(2) Install the drain under cover (A).
(3) Fill with new engine oil while checking the oil level on the dipstick.
Capacity
Total :
4.1 L (1.08 U.S.gal., 4.33 U.S.qt., 3.61 lmp.qt.)
Oil pan :
3.4 L (0.90 U.S.gal., 3.59 U.S.qt., 2.99 lmp.qt.)
Drain and refill including oil filter :
3.8 L (1.00 U.S.gal., 4.02 U.S.qt., 3.34 lmp.qt.)
Warning
- Fill the crankcase to about half the capacity and then fill the remainder after waiting.
- Do not fill oil over the 'F' line and check frequently the level with the oil level gauge to ensure no overfilling.
(4) Install the oil filler cap (A) and the oil dipstick.
- Start the engine and check that no oil is leaking from the drain plug or oil filter.
- Recheck the engine oil level.
Warning
When rechecking the engine oil level, be sure to warm up the engine sufficiently. If the engine has not warmed up sufficiently, the measured engine oil level may be less than the specification.
- To reset the service interval to the recommended mileage, refer to the service mode section in the owner's manual for procedure (if applicable).
Inspection
- Visually check the pipes, hangers and connections for severe corrosion, leaks or damage.
- Check for unusual exhaust sounds or abnormal exhaust fumes.
Inspection
Visually check the fuel lines for cracks, leakage, loose connections, deformation or tank band looseness.
READ NEXT:
 On vehicle inspection/ Component Inspection
On vehicle inspection
Accelerate the engine to about 3,000 rpm 3 times or more.
Remove the spark plug.
Check the spark plug visually.
If the electrode is dry, the spark plug is normal.
If the electrode is wet, check the damage and elect
Oil Level Check
Remove the under cover.
(Refer to Engine Mechanical System - "Engine Room Under Cover")
Remove the oil filler plug (A or B).
Check the condition of the oil and make sure that it is at the proper
level (A).
Inst
Front Brake
Inspection
Check the pads for excessive wear, discs for run out and wear, and calipers
for fluid leakage.
Front brake disc thickness check
Check the brake pads for wear and fade.
Check the brake disc for damage and cracks.
Remove all rust
SEE MORE:
Clutch Engagement Fork and Engagement Bearin
Components
Engagement bearing 2 (Even)
Engagement bearing 1 (Odd)
Engagement bearing sleeve
Engagement fork 1 (Odd)
Engagement fork 2 (Even)
Clutch Engagement Fork and Engagement Bearing Repair procedures
Removal
Remove the du
General safety information and caution
Precautions
General Precautions
Please read the following precautions carefully before performing the airbag
system service.
Observe the instructions described in this manual, or the airbags could
accidentally deploy and cause damage or injur
Categories
- Home
- KIA Niro EV, Hybrid - Second generation - (SG2) (2021-2024) - Owner's manual
- Kia Niro - First generation - (DE) (2017-2022) - Service and Repair Manual
- Contact Us