KIA Niro: Fuel Tank Air Filter Repair procedures
Kia Niro - First generation - (DE) (2017-2022) - Service and Repair Manual / Emission Control System / Crankcase Emission Control System / Fuel Tank Air Filter Repair procedures
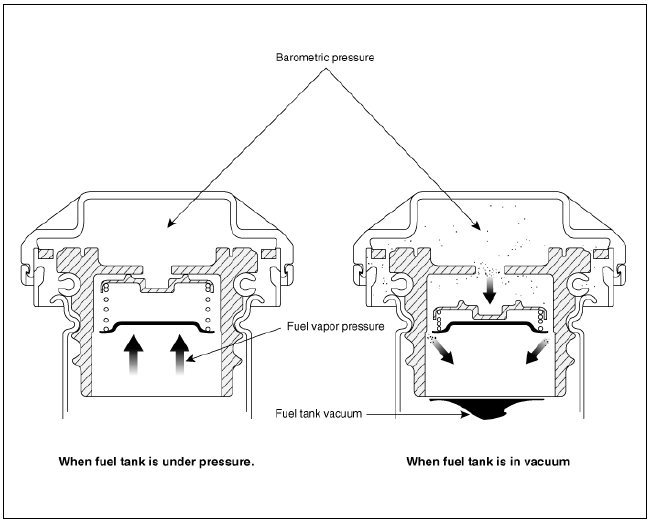
Fuel Filler Cap Description and operation
Description
A ratchet tightening device on the threaded fuel filler cap reduces the chances of incorrect installation, which seals the fuel filler. After the gasket on the fuel filler cap and the filler neck flange contact each other, the ratchet produces a loud clicking noise indicating the seal has been set.
Removal
- Turn ignition switch OFF and disconnect the negative (-) battery terminal.
- Remove the filler-neck assembly.
(Refer to Engine Control / Fuel System - "Filler-Neck Assembly")
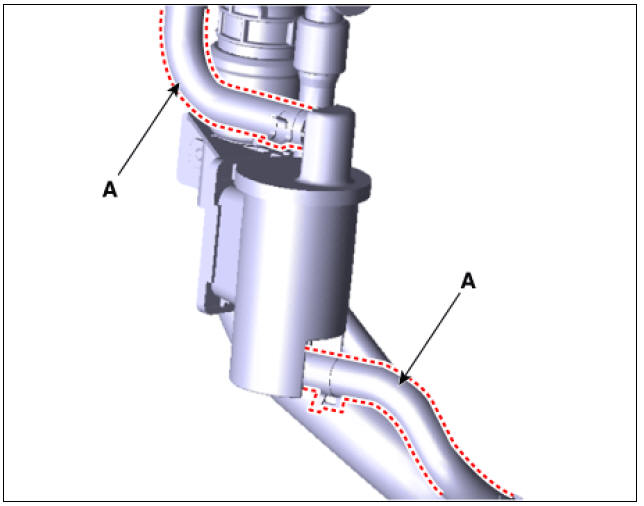
- Disconnect the vent hose (A).
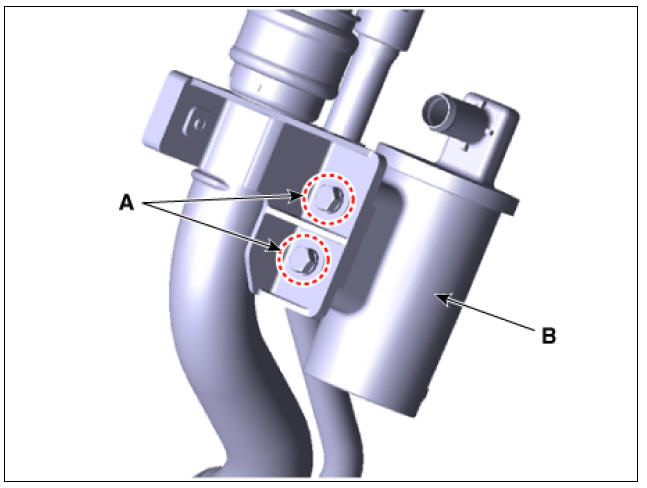
- Remove the fuel tank air filter (B) after loosening the mounting bolts (A).
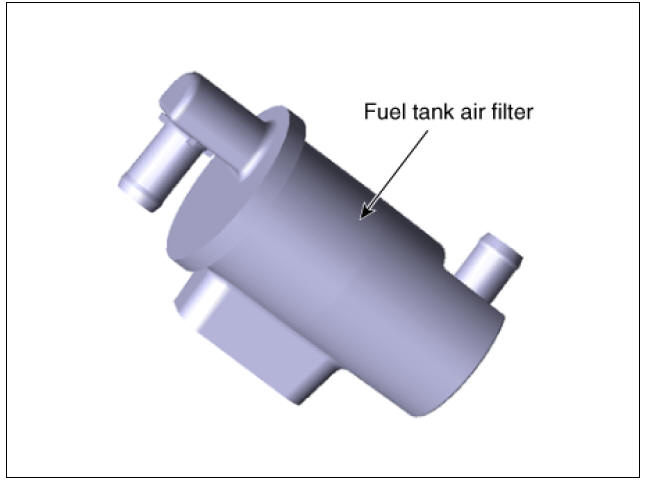
Installation
- Install in the reverse order of removal.
READ NEXT:
 Exhaust Emission Control System
Description
Exhaust emissions (CO, HC, NOx) are controlled by a combination of engine
modifications and the
addition of special control components.
Modifications to the combustion chamber, intake manifold, camshaft and ignition
system form t
The Gasoline Particulate Filter (GPF)
Description
The Gasoline Particulate Filter (GPF) system prevents Particulate Matter (PM)
from being discharged to the atmosphere and
consists of a filter assembly, two Exhaust Gas Temperature Sensors (EGTS). The
filter is integrated in the cat
Engine Control / Fuel System
Specifications
Fuel Delivery System
Sensors
Manifold Absolute Pressure Sensor (MAPS)
Type: Piezo-resistive pressure sensor type
Specification
Intake Air Temperature Sensor (IATS)
Type: Thermistor type
Specification
SEE MORE:
Seat belt restraint system
Seat belt warning light
Front seat belt warning light (Kia NIRO Hybrid)
Operating condition(s)
When the vehicle is running
The front seat belt warning light will
appear for approximately 6 seconds
When the front seat belt is unfastene
Hybrid Control System - Tightening Torques
Hybrid Control System
High Voltage Battery System
High Voltage Battery Control System
High Voltage Battery Cooling System
Low Voltage DC/DC Converter (LDC)
High Voltage Battery Charging System
Power Cable
Spec
Categories
- Home
- KIA Niro EV, Hybrid - Second generation - (SG2) (2021-2024) - Owner's manual
- Kia Niro - First generation - (DE) (2017-2022) - Service and Repair Manual
- Contact Us